How To Make DIY Pressed Flower Candles

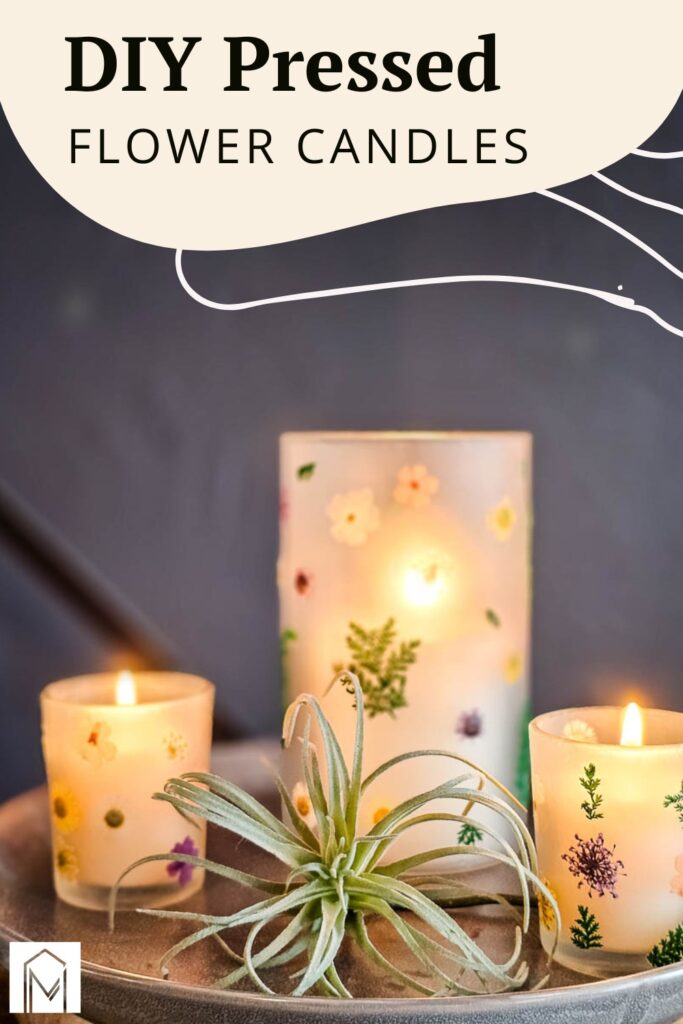
These fun pressed flower candle holders make for a fun Spring decor craft idea! They are so easy to make and make a great gift idea!
Spring is all about adding little touches of color around your home, even better if you can add some florals. These easy DIY pressed flower candle holders are a great simple craft that you can make with simple supplies for the Spring season! They also make great gifts for teachers for Teacher Appreciation Day or Moms and Grandmas for Mother’s Day!
This project is definitely easy enough for even the kids to help out! They will love this pressed flower craft.
This tutorial for pressed flower candles contains affiliate links, but nothing that I wouldn’t recommend wholeheartedly. Read my full disclosure here.
Pressed Flower Candles: Step-by-Step Tutorial
Supplies
Step 1. Brush on a thin layer of Mod Podge
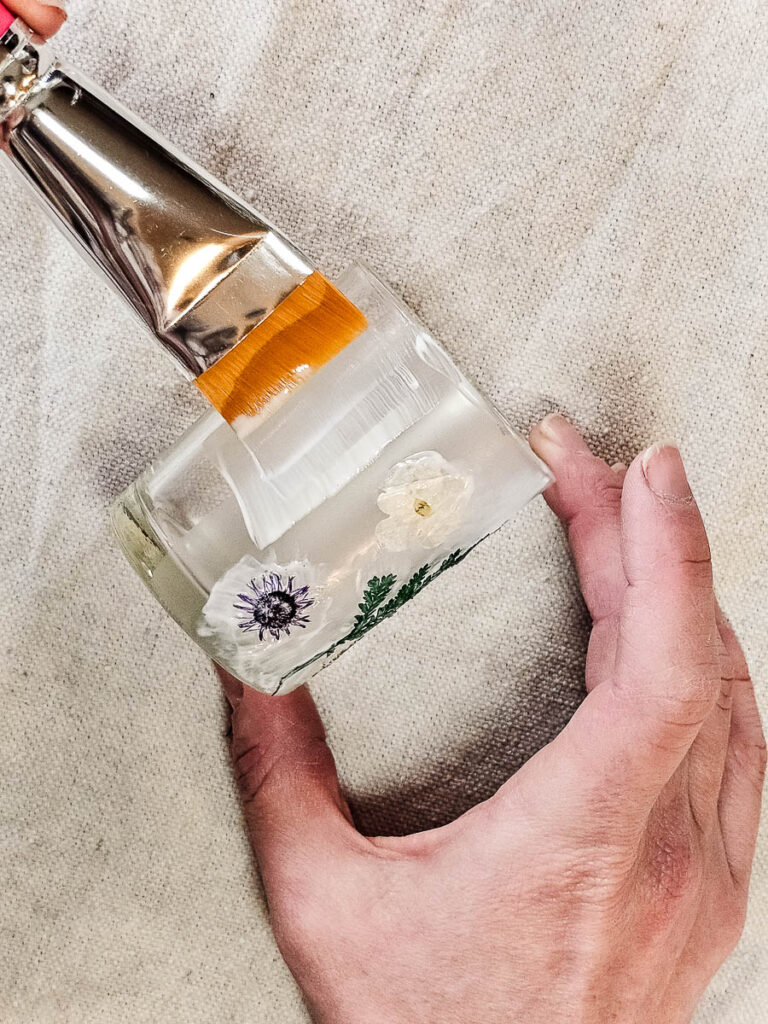
Add a thin layer of Mod Podge onto a small area on the glass jars. I worked on one side at a time so you have somewhere to grab with your hands.
You could use whatever glass candle holders you have on hand. Even mason jars would work for this craft project!
Step 2. Add pressed flowers
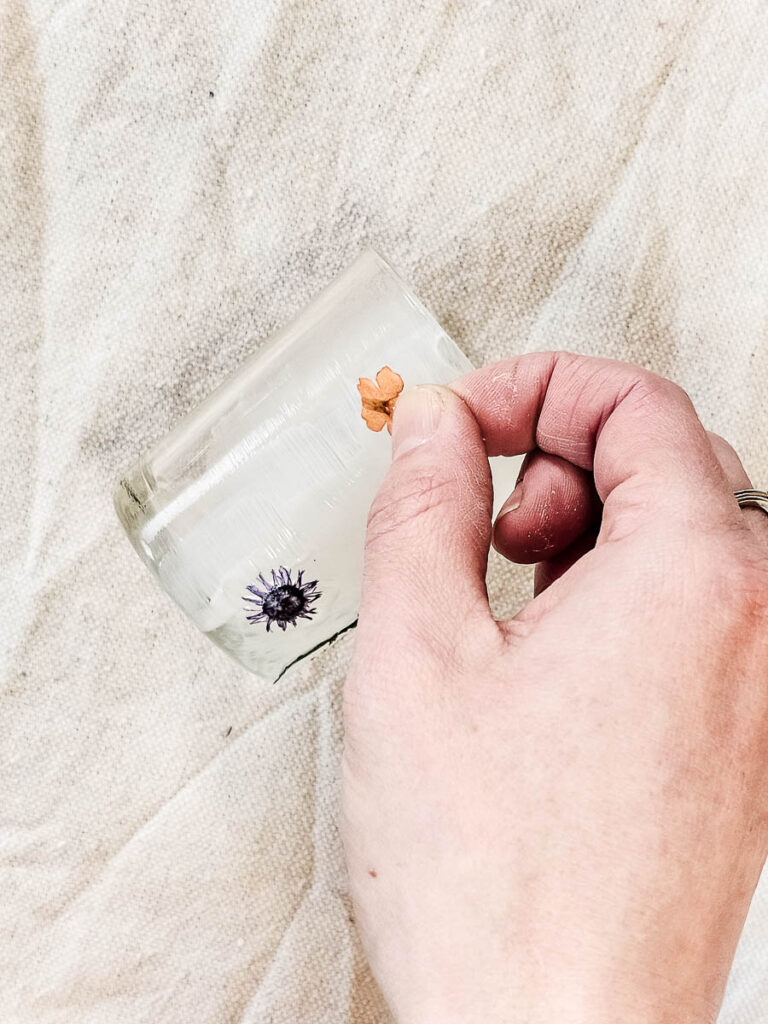
Gently set the pressed flowers onto the wet Mod Podge. Cover the dried flower with another layer of Mod Podge. Be sure to brush delicately to avoid damaging or folding the flower.

If the flower moves while you apply the Mod Podge, try dabbing the brush instead of brushing it back and forth.
The Mod Podge dries quickly, so you need to work quickly as you set the flowers into place. If the Mod Podge has already dried, just add another layer before setting the flowers down.
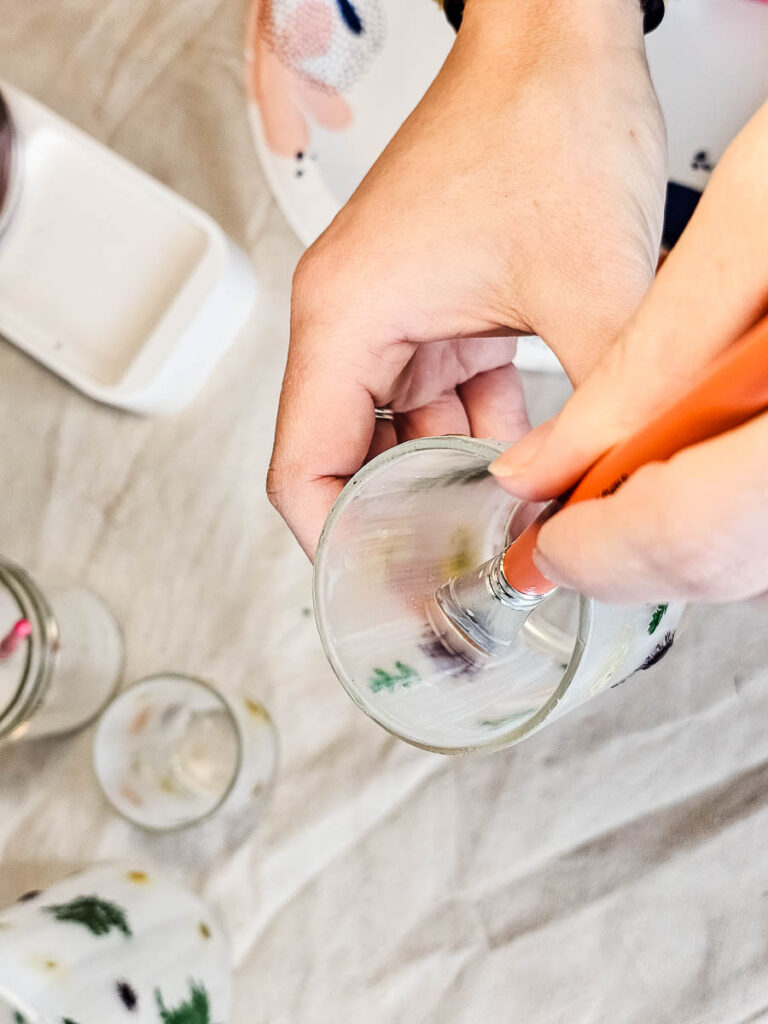
Step 3. Let dry and add another coat of Mod Podge
After everything on the candle holder is dry to the touch, add another coat of Mod Podge to keep to protect the flowers. You shouldn’t need to be as careful this time with the brushing since the flowers already secure themselves.
Step 4. Add Mod Podge to the inside of the candle holder (optional)
As an optional step, you can opt to add more Mod Podge on the inside of each glass candle holder. This step is not necessary, but it helps make the glass more opaque, which is a fun effect when you add the candles.
After you finish, allow the candle holder to dry overnight.
Step 5. Add candles
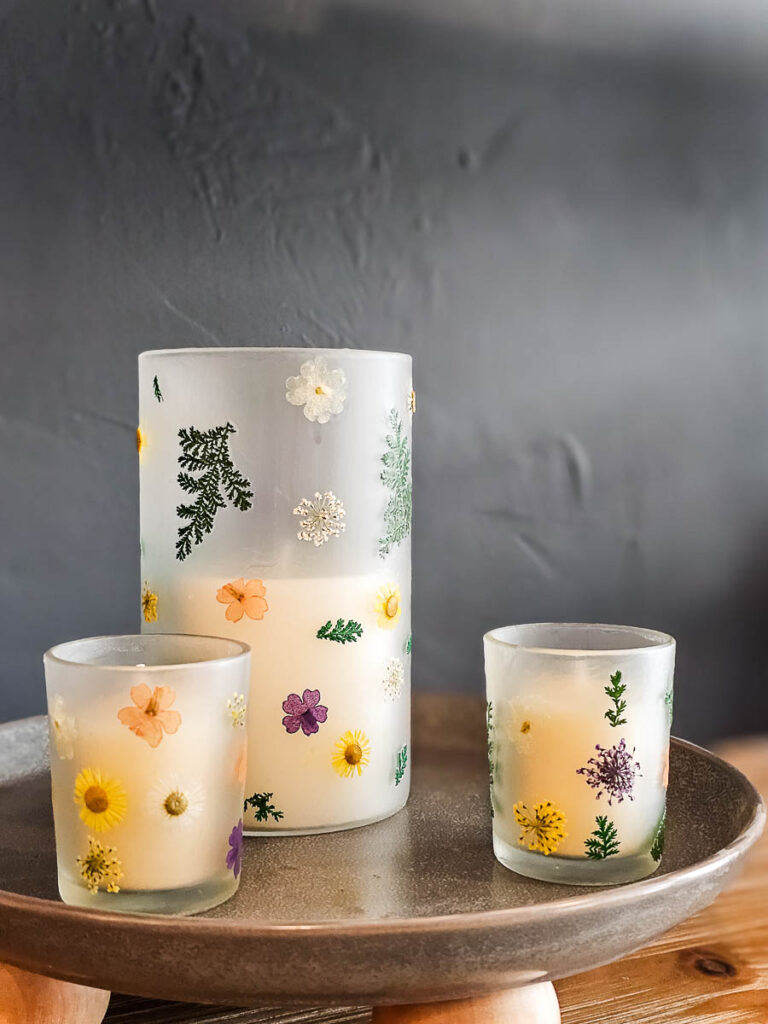
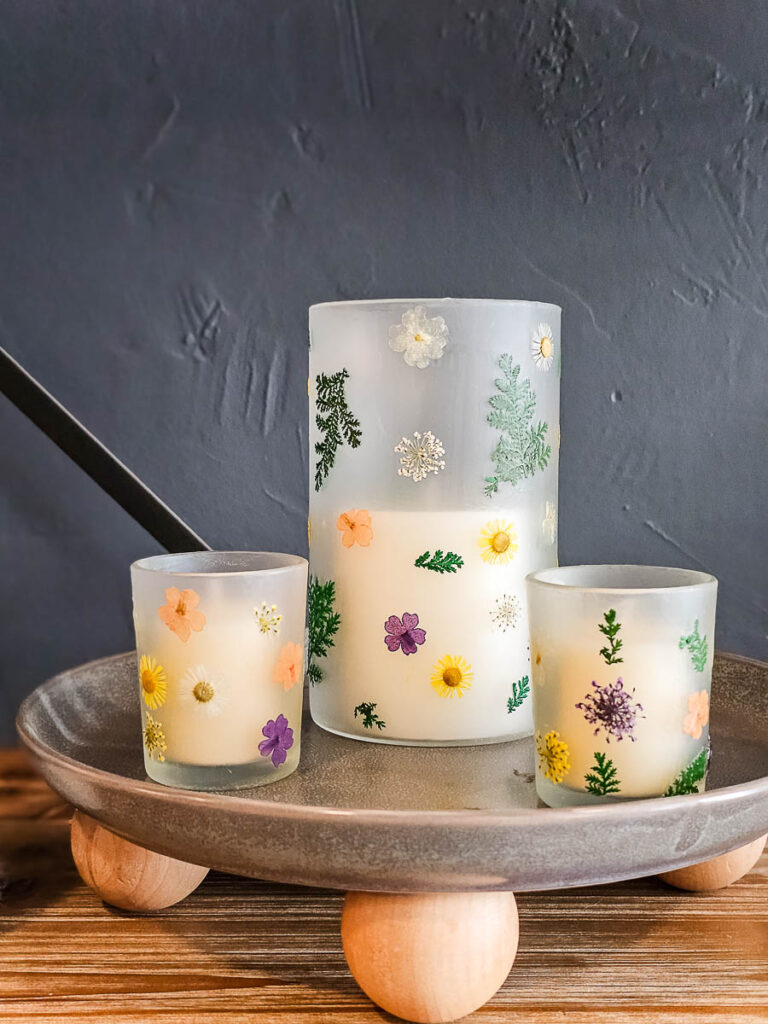
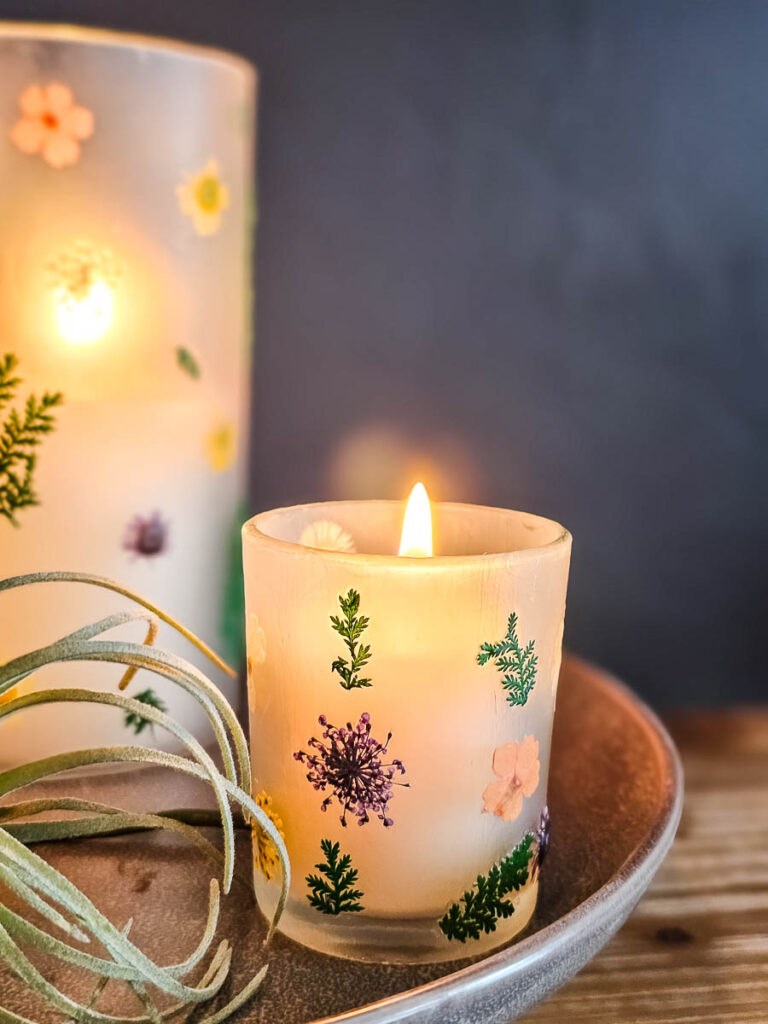
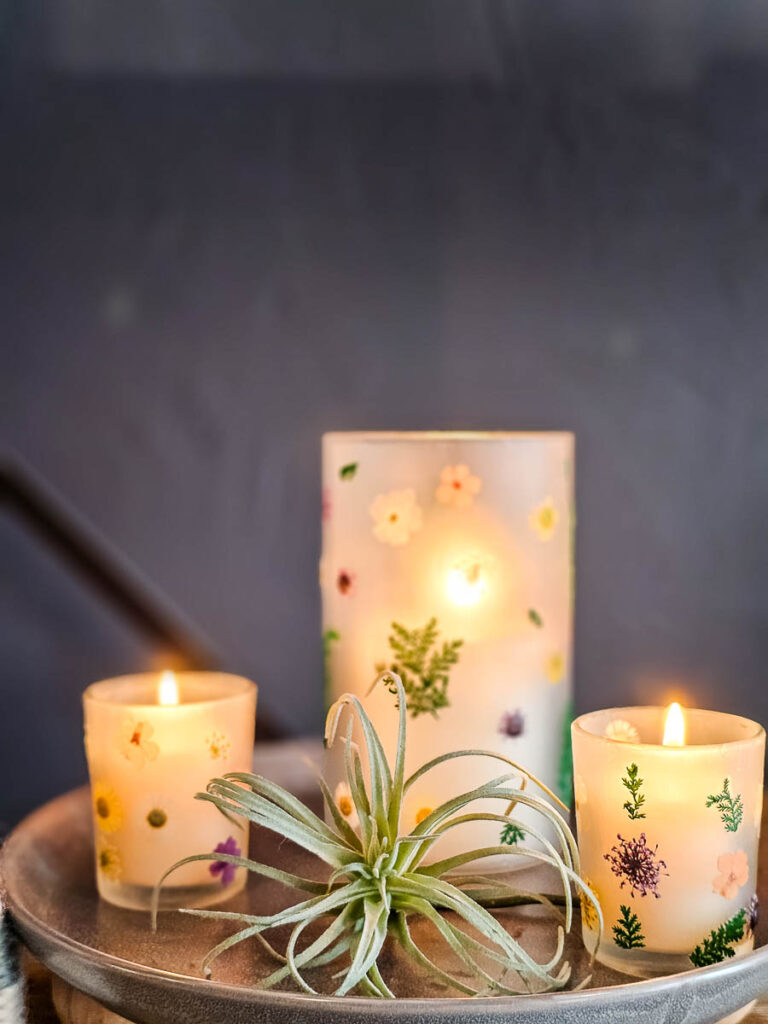
Lastly, you can put your flower candle holders into place and set the candles inside. Light them and watch how fun the pressed flowers look with the flickering flame behind them! They look like little lanterns when the candles are lit.
You could also use battery operated candles in the glass jars!
I love the flowers in the glass candle holders. I can use them over and over. I just swap out the candle as it melts.
But if you’d rather have the pressed flowers on the candles, you could totally do that instead! Just use the Mod Podge directly on the candle and add the flowers there.
These DIY pressed flower candle holders are such a fun and easy way to bring a touch of spring into your home. Whether you’re making them for yourself or as a thoughtful gift, they add a beautiful element to any space.
Plus, they’re a great way to get the kids involved in a simple, creative project. So grab some flowers, light a candle, and enjoy the soft glow of your pressed flower candles!