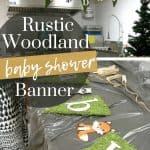
DIY Baby Shower Banner with Rustic Woodland Theme
This tutorial couldn't be any easier. Check the step by step tutorial for how to make this DIY baby shower banner for a rustic woodland baby shower.
I’m so excited to share this fun DIY baby shower banner for a rustic woodland shower with you today. This was something I made for my sister’s woodland baby shower a few weeks ago.
I’ve been showing you all the fun DIYs for this shower, including the baby shower name tag. I can’t wait to show you how everything at the shower turned out – stay tuned; the big reveal is coming soon! UPDATE: Check out how the rustic woodland baby shower food and decor turned out.
This DIY baby shower banner tutorial contains affiliate links, but nothing that I wouldn’t wholeheartedly recommend anyway! Read my full disclosure here.
Supplies for DIY Baby Shower Banner:
- Recycled cardboard for pendants
- Moss
- 3-in-1 glue (once you start using this glue, you won’t ever turn back)
- Jute, twine, or string
- Clothespins
- Wood animal cutouts (optional – I found mine at my local craft store in one of the dollar bins, you could also use something like this)
- White paper for letters
- Paper cutter, die cut machine, or purchase pre-cut letters
- Scissors
How to Make a DIY Rustic Baby Shower Banner with Moss
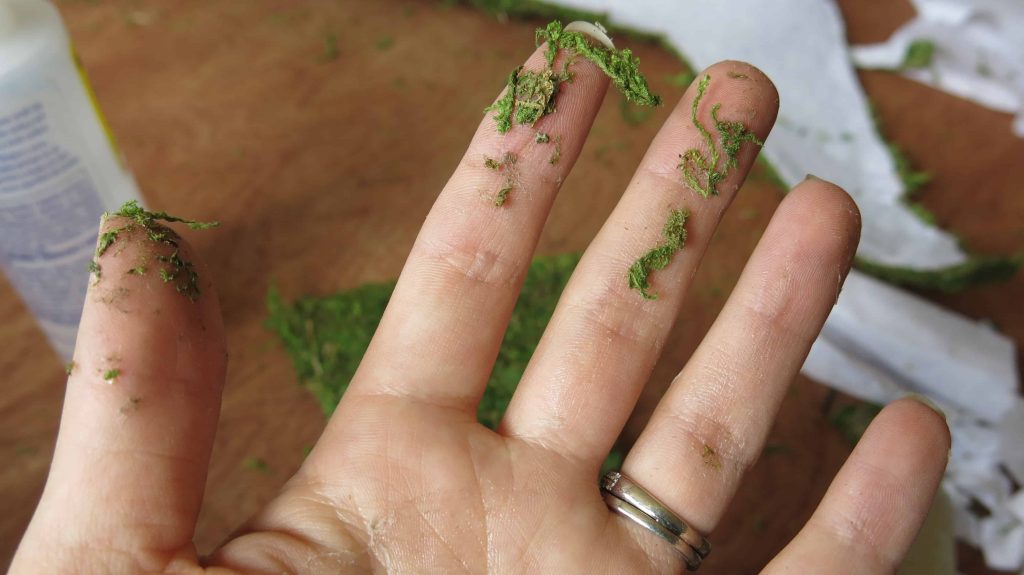
Before we get started, just a quick warning, this moss can get really messy, and you’ll probably find your hands like this. I’d recommend putting something down to work on so your clean-up is easier!
Step 1. Cut out cardboard pendants.
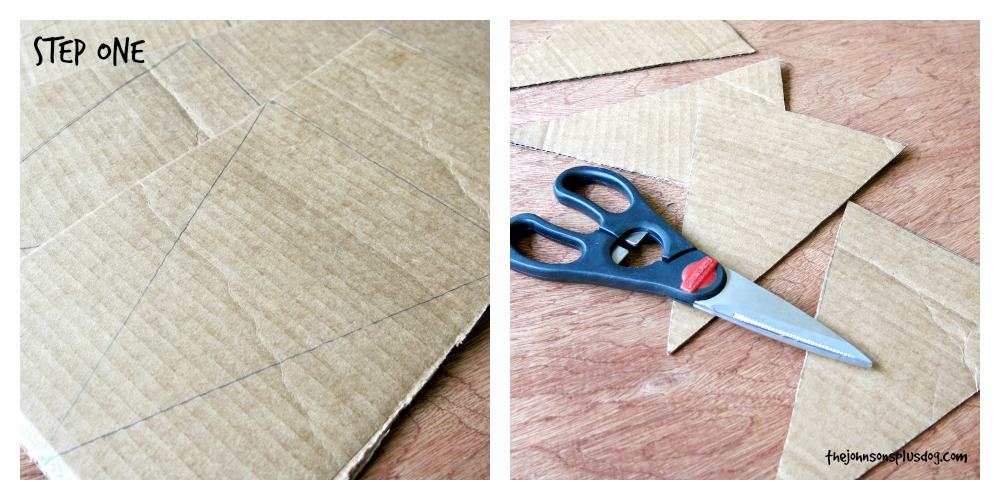
I used old recycled cardboard for the pendants. Using cardboard is great because it is free!
I know you always have a ton of cardboard boxes sitting around, right? Check out these cardboard crafts for adults for more genius ideas.
Start by cutting the cardboard pendants about 6 inches wide at the top and about 8 inches tall. I used a straight edge to trace the pendants.
To get them nice and square, just make sure you’re creating the point in the exact middle of the top line and just connect the dots!
Step 2. Cover the pendants with moss.
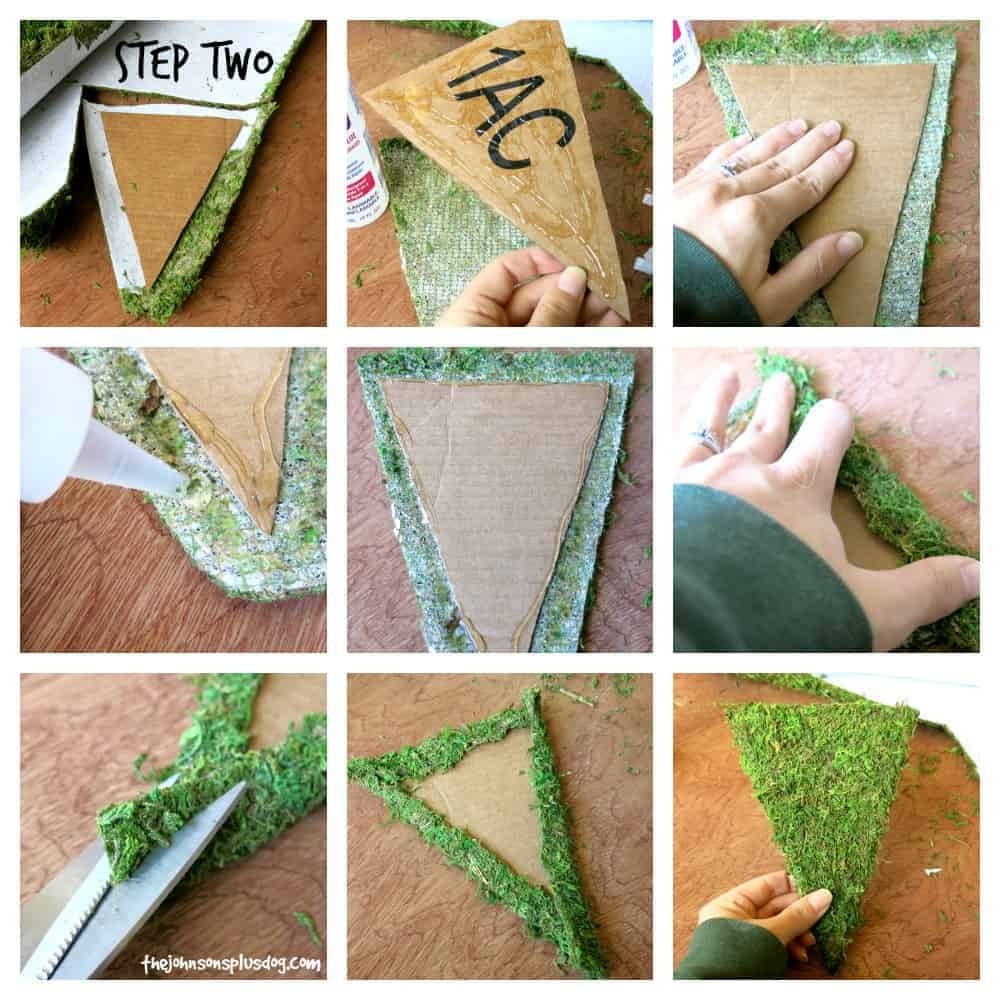
Cut out the sheet moss so you have a 1/2-inch to 1-inch border to wrap around the back. Peel off the paper backing from the moss. Add lots of glue to your cardboard and press down on the back of the moss. I held it there for about 20 seconds before moving on.
Next, add glue to the border and a thin line on the edge of the cardboard. Then fold the moss over the back edge and hold it in place until the glue adheres (20-30 seconds).
I did each edge separately. Trim off any excess moss on the corners. Repeat the process for all of your pendants.
Step 3. Cut your letters out and attach them with glue.
I don’t have a picture of this because my wonderful mother cut these letters out for me and brought them to the shower for me. I have no idea where my Silhouette Cameo paper cutter is in my garage… oh the joys of renovating and moving!
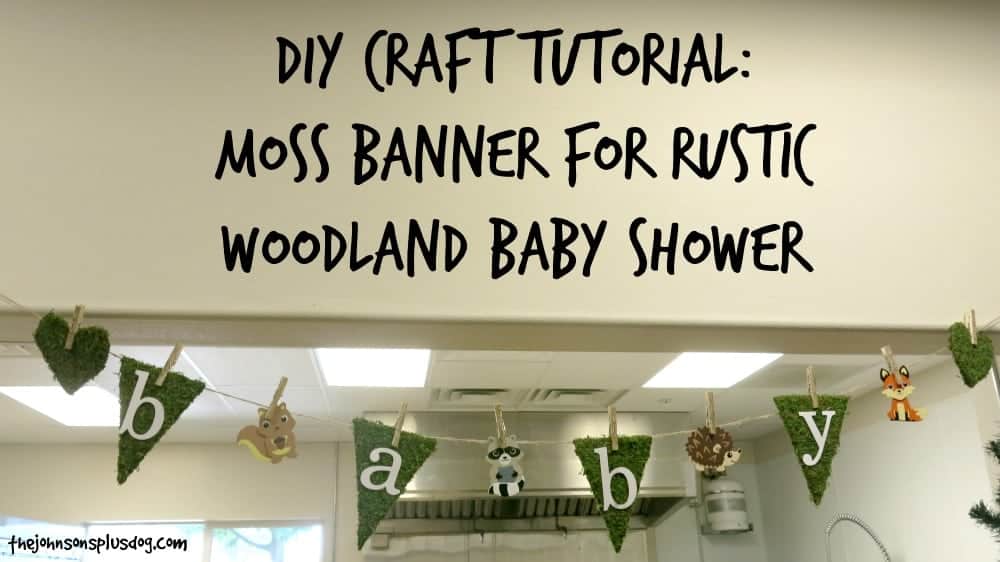
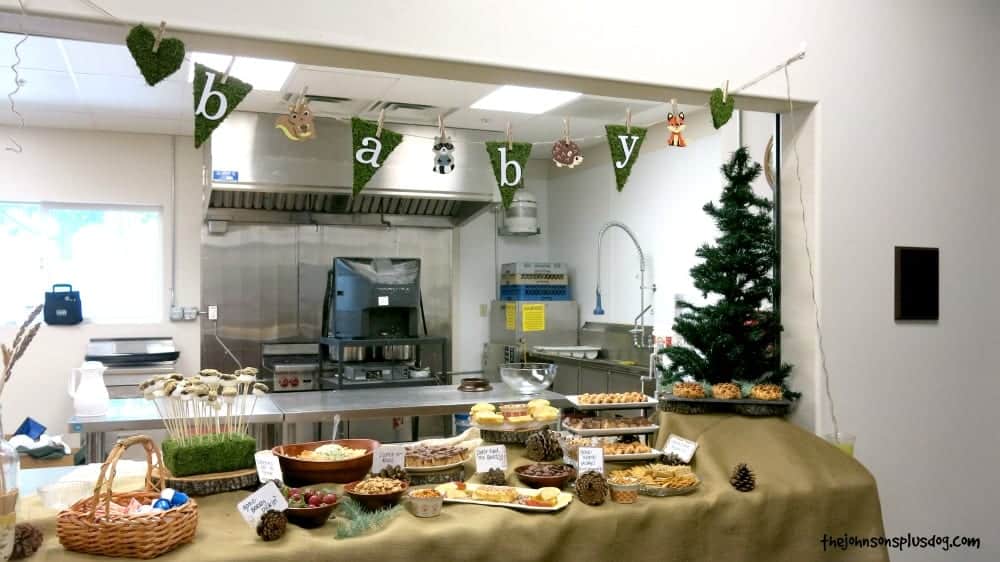
Step 4. Assemble your moss banner for a rustic woodland baby shower.
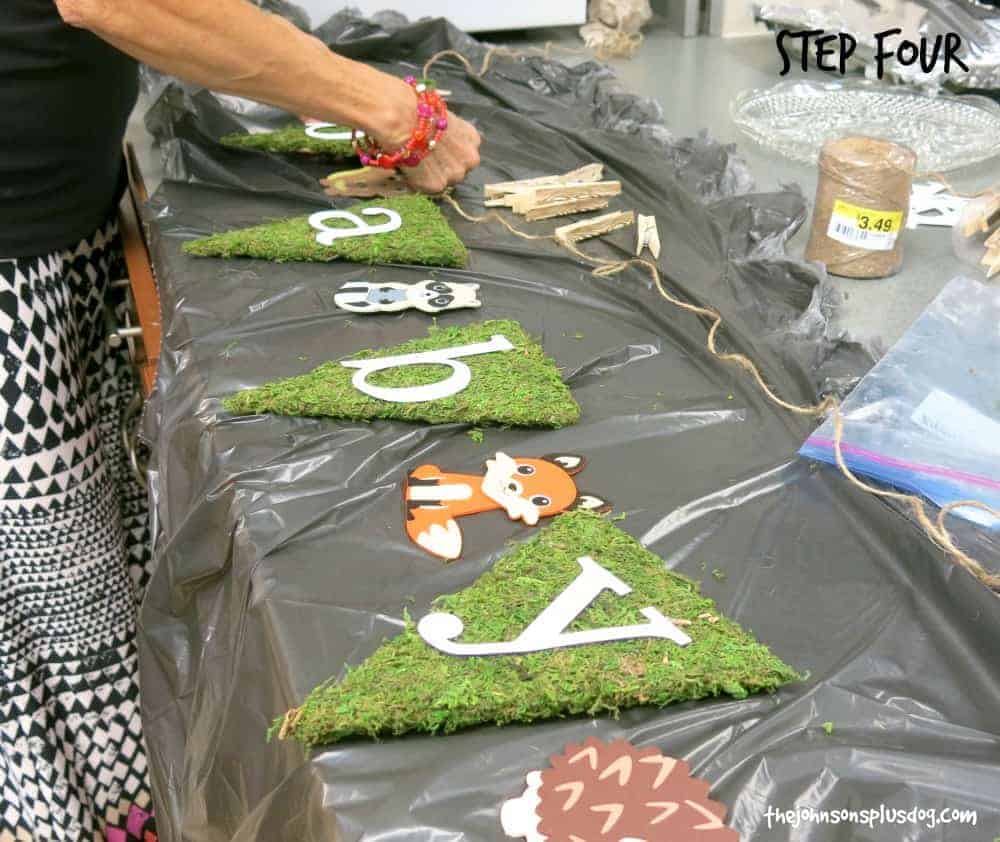
We did the assembly of the banner on-site because it was easier to transport it all in separate pieces.
Figure out how long it needs to be for the area where you are hanging the banner, and spread out the pendants and animals (optional) accordingly.
We just used some twine and clothespins to attach. I covered those clothespins with fun wood-looking washi tape I found at Hobby Lobby.
I added some moss-covered hearts at the end. I made them using the same process as the pendants.
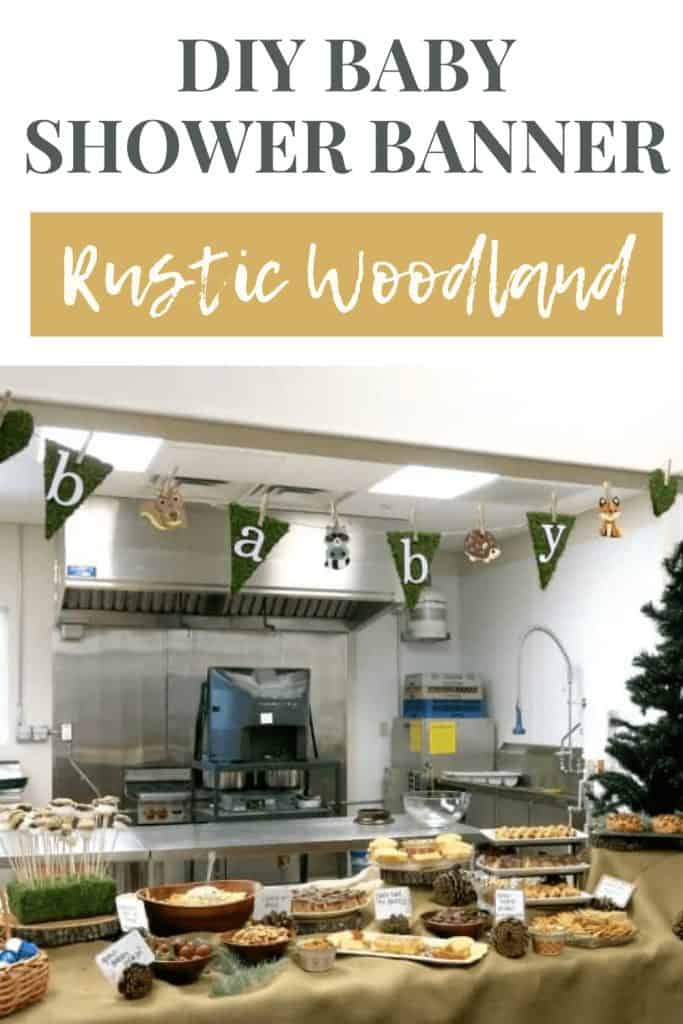
Did this DIY baby shower banner turn out so cute? It was so easy to make and really added a lot to our decorations at the rustic woodland baby shower.
If you’re looking for a fun banner for your next rustic-themed party, consider adding moss for an extra bit of woodland charm.
Related: More DIY Decorations
How To Make a DIY Baby Shower Banner
This rustic moss baby banner is the perfect woodland-themed baby shower decoration! You only need a few supplies for this simple baby shower banner DIY.
Materials
- Recycled cardboard for pendants
- Moss
- 3-in-1 glue
- Jute, twine or string
- Clothespins
- Wood animal cutouts
- White paper for letters
Tools
- Paper cutter or die cut machine
- Scissors
Instructions
- Cut out cardboard pendants.
- Cover with moss.
- Cut your letters out and attach with glue.
- Assemble your moss banner for rustic woodland baby shower.
omg this is TOOOOO cute!!!
This banner is awesome! I love the green. Thanks so much for sharing with us at Merry Monday.
Hello Friend, You always have the best projects!!! Thank you for sharing at the Friday Favorites Link Party! Please join us again to share what you have been working on this week. Hugs – Christine at Must Love Home
Thanks Christine!
What a unique banner. And a great way to bring the outdoors inside.
I love this! What a cute idea. It would super fun at Easter too. Thanks for sharing and co-hosting at the #HomeMattersParty – we appreciate you! 🙂
~Lorelai
Life With Lorelai