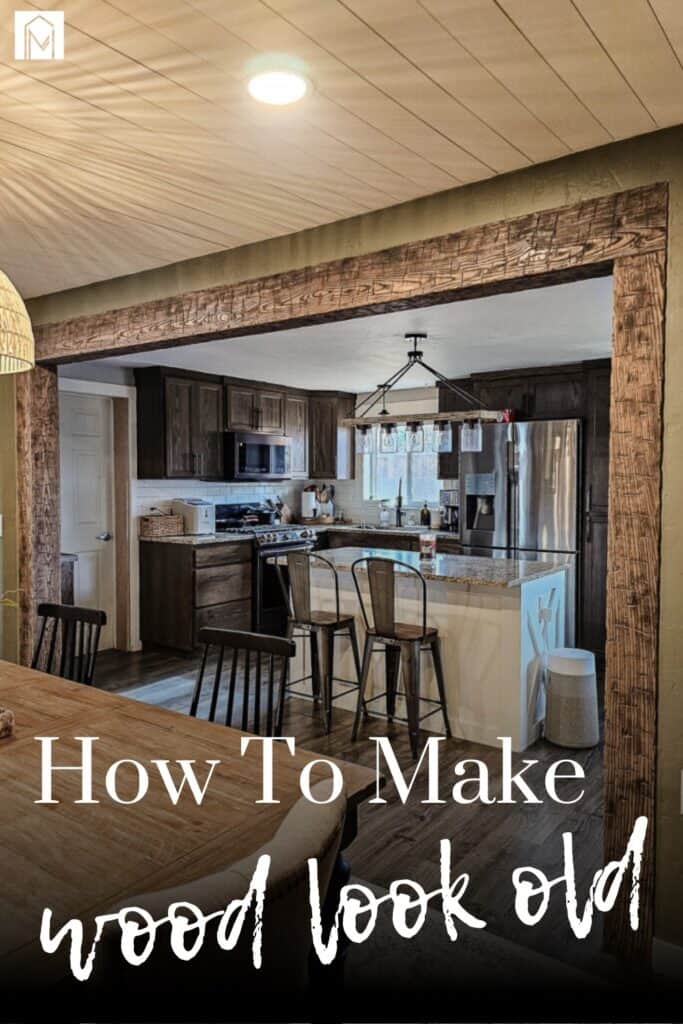
How To Distress Wood To Make It Look Old: Easy Techniques
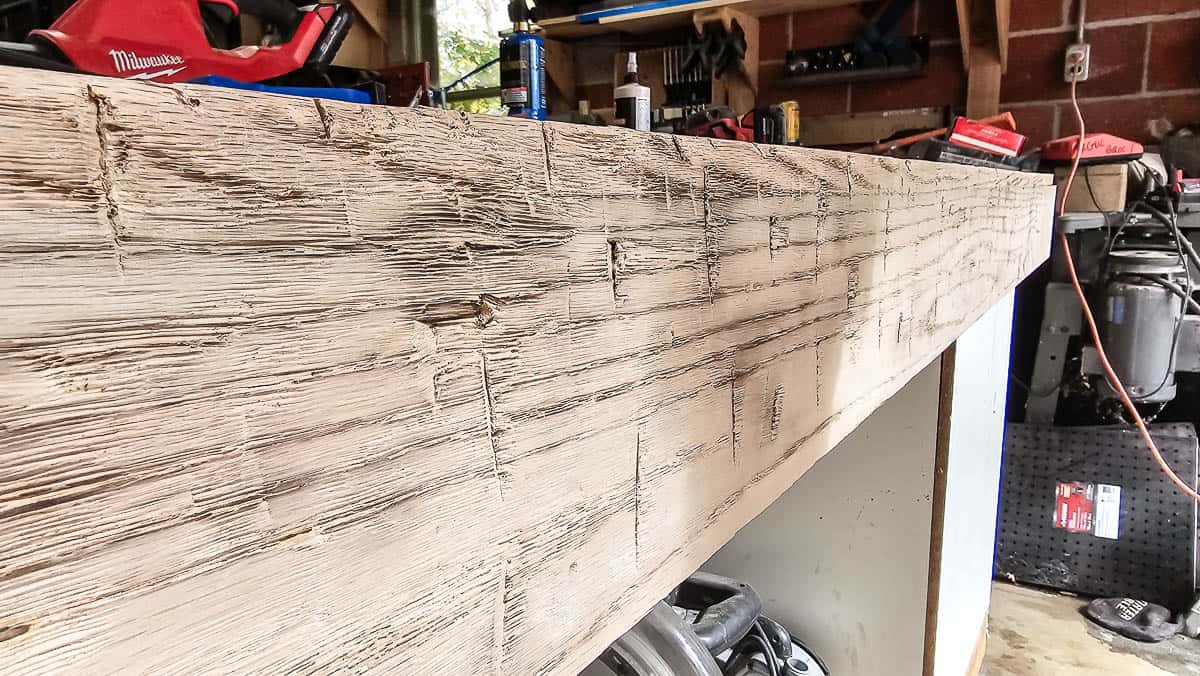
We wanted the faux wood beams in our dining room to look authentic and old. We experimented with a lot of different tools in our workshop before deciding on our exact distressing technique.
I love how they turned out! The aged look was the result of a lot of manual labor and various techniques layered together. But they totally look like they’ve had years of wear, don’t you think?
Today we’re walking you through the entire process of how to make new wood look like older wood with a rustic look. You can use this general process on any wood surface, so whether you’re building wood beams or refinishing a nice piece of furniture that you want to look old, you can use these tips.
There are many different ways to distress wood to make it look old, but we’ll go over exactly what we did and explain each tool we used in depth to achieve our aged wood look.
You can choose to add or subtract any of these steps to achieve the look you are going for. With each step below, the key is to not go overboard with one tool. To get good results, it will be a gentle layered of many different types of distressing. Leave room for each tool to make its own mark on the wood.
This tutorial for how to distress wood contains affiliate links, but nothing that I wouldn’t recommend wholeheartedly. Read my full disclosure here.
Tools you’ll need to distress wood
Step 1. Choose the type of wood
If you’re going to be distressing wood on one of your woodworking projects, you’ll need to first choose a type of wood. Different types of wood will look different when distressing, so this is one of the most important steps.
The distressing process is very labor intensive so you want to make sure you pick correctly. If you’re in doubt, feel free to try the process out on a couple different of scrap wood pieces.
We decided to use oak wood. Oak is a hardwood with a strong grain pattern. The grain of wood just adds to the weathered look in our opinion. Because we were making wood beams, we wanted to use a wood type that would actually be used for beams so they looked more authentic and oak is traditionally used for wooden support beams.
Step 2. Run a hand planer over the surface of the wood
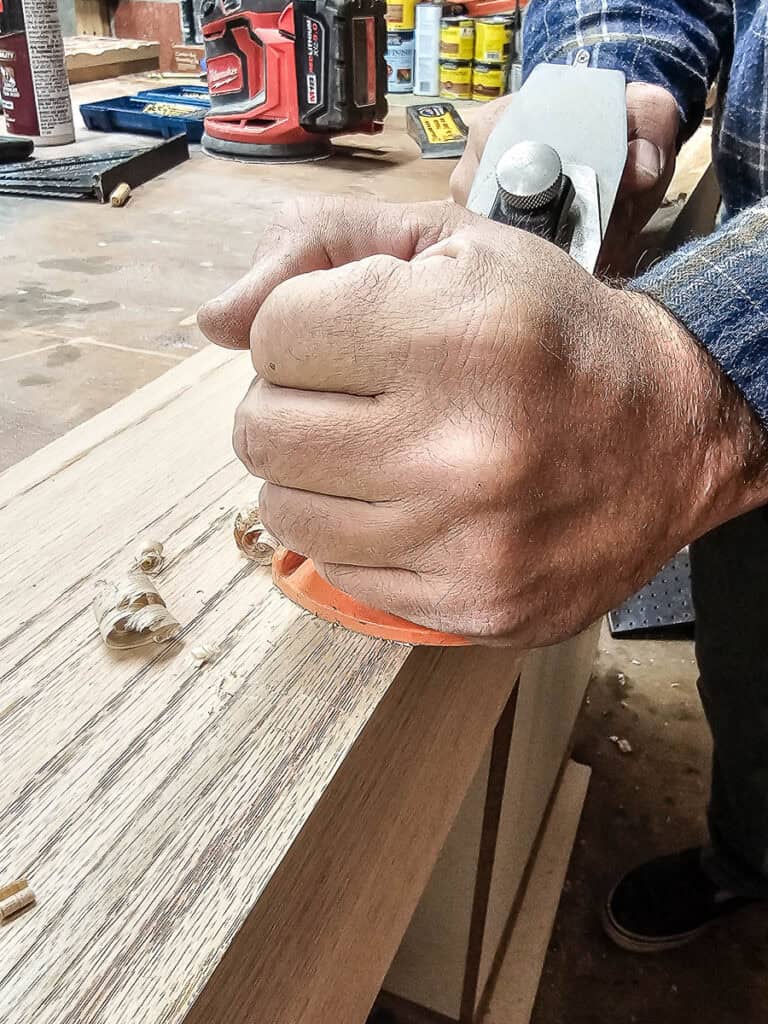
The first step is to use a hand planer on the new surface of the wood. A hand planer has a sharp blade used to “plane” wood and make it flat. New wood that is purchased at the hardware store, like The Home Depot or Lowe’s, has been planed with large commercial planers to get the wood super smooth.
By using a hand planer on the wood, you’ll get rid of the super smooth look on the entire surface and instead, you’ll get something that looks more like it has been hand-carved.
Using a hand planer is simple. Just set a depth by twisting the wheel at the top, place the planer on the wood, and push it with grain in small and short runs. As you plane the wood, you’ll take off little shavings here and there and it makes a mess.
As you use the planer, be sure to keep your runs short so that it leaves little stop cuts all throughout the surface of the wood to give that hand-carved look. Don’t go over the surface of the smooth wood too many times with the planer because then you’ll plane those stop cuts out.
Step 3. Chop the wood with a hatchet
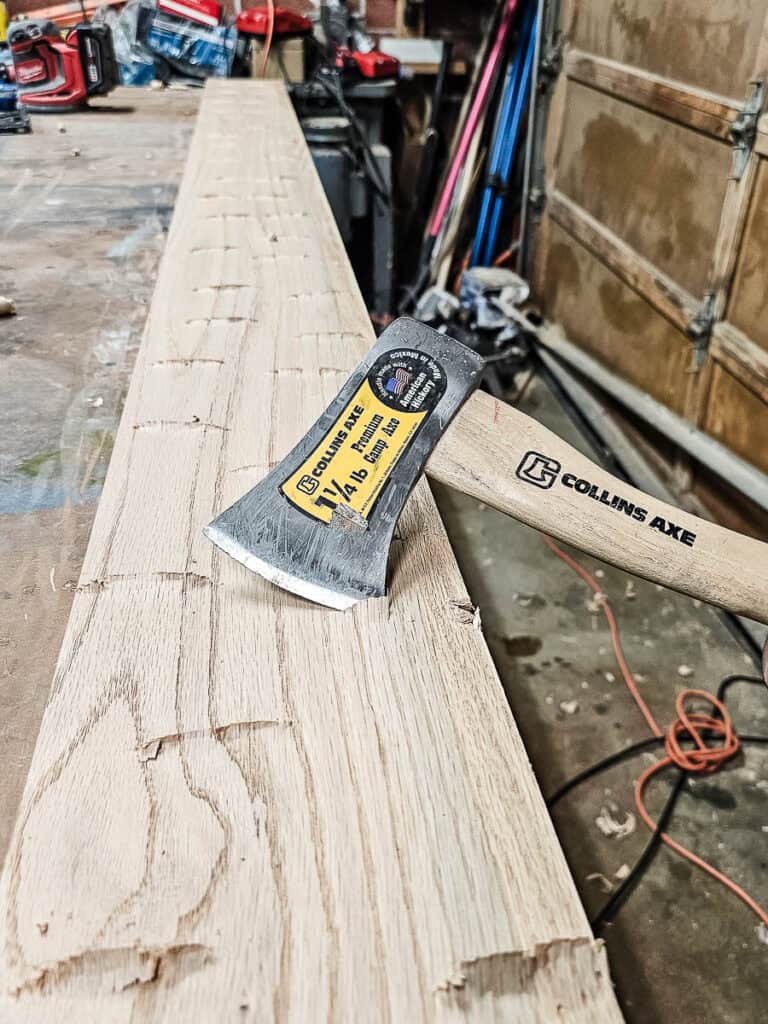
For the next step, you’ll use a hatchet to make chopping marks on the wood. The step makes a big difference on the surface damage of your finished project, so decide now just how “distressed” you want the wood to be. We wanted ours to be very beat up and old-looking and that’s what the hatchet is for.
We used the hatchet to make deep cuts and grooves into our wood beams. We wanted to achieve that raw axe cut look for this and we were pleased with the results.
Carefully swing the hatchet and chop at about 45 degrees in one direction to the wood making deep cuts. Every now and then we turned the hatchet to change the direction of the cut to make a larger divet with the axe points and go deeper.
Be sure not to chop the hatchet straight down at the wood because you may go through the board or cause it to split.
After you’ve made all the axe cuts, hold the hatchet flat against the wood and run it over the surface to scrape down all the chopped wedges.
Don’t forget to make some marks with the hatchet on the edges of the board.
Step 4. Dent the wood with a hammer
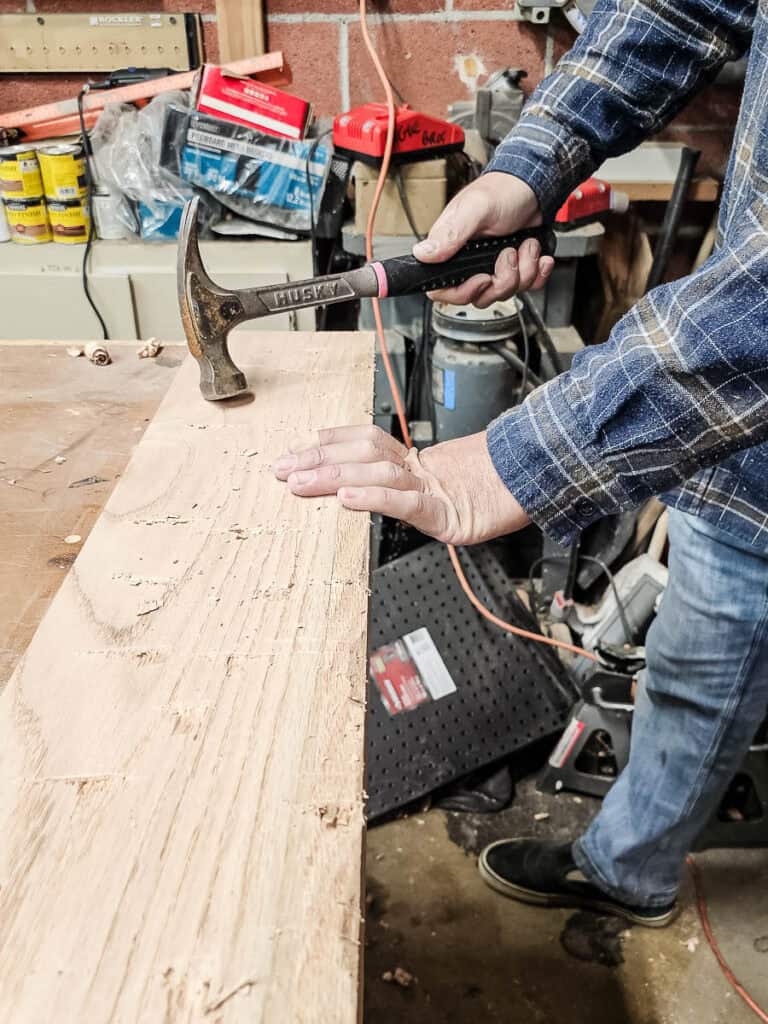
Next, we used a hammer to replicate dents that wood would naturally get over time by drying out, getting bumped into, or beating it would take when the wood beam was installed.
Just bang the hammer all over the bare wood in random spots. You can be pretty aggressive with this step and put in a lot of hammer dents all along the wood if you’d like. This won’t affect the distressed look the other tools will give and it just adds more character.
Different types and sizes of hammers will give different results so feel free to experiment here. However, we’d recommend staying away from a waffle print and keeping to a smooth hammerhead. We tried the waffle hammer on some scrap wood and didn’t love the look.
After this step, you can lightly sand the surface with a random orbital sander and 220-grit to remove any pieces of wood that are barely hanging on.
Step 5. Use a wire wheel on a drill
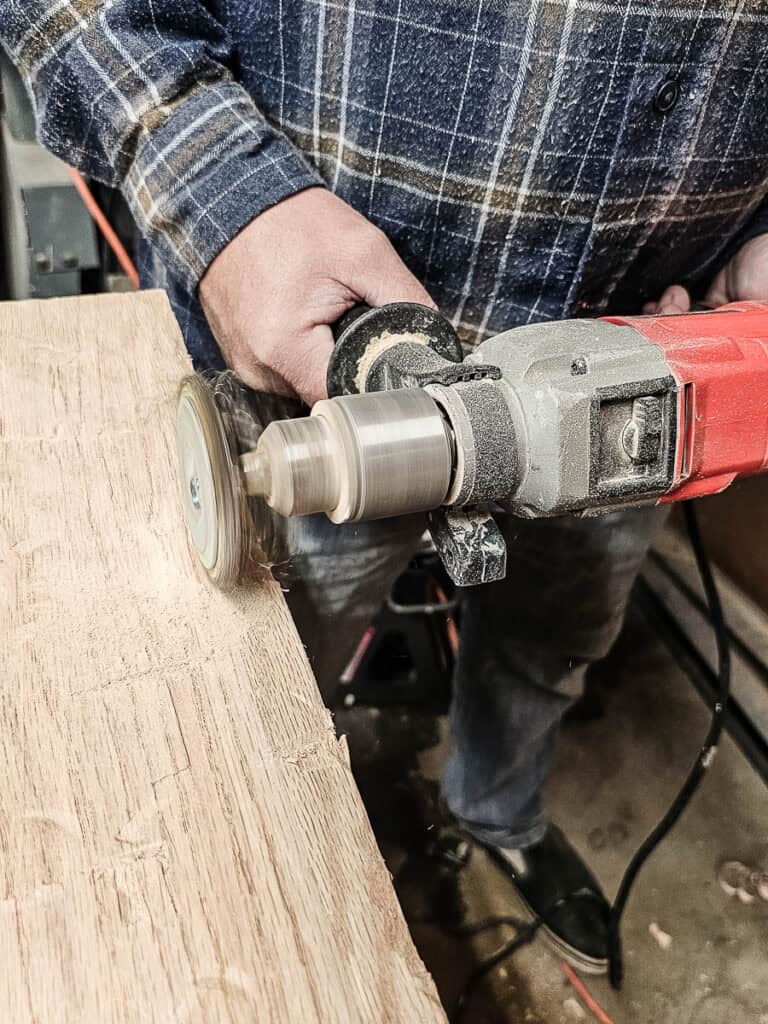
For this step, if you have a sandblaster, feel free to use that. We don’t so we used a drill with a wire wheel attached. This will dig out the wood in between the grains to give a really distressed old wood look.
Over time, wood will wear out but the grains are hard, so digging out the wood makes it look like it’s already gone through the aging process.
Feel free to experiment with different types and sizes of wire brushes on your drill.
Step 6. Use a nail punch to make holes
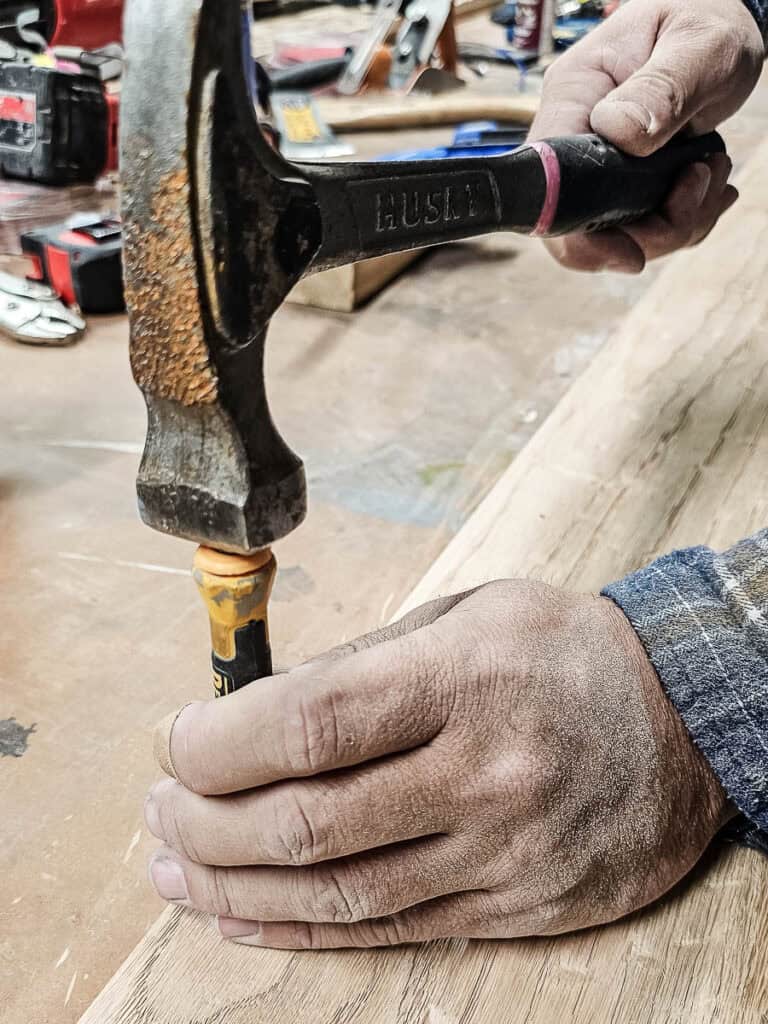
We used two different sizes of nail punches to create the look that things were hung on the wood beams. Take the hammer and drive the punch deep into the wood and then take it back out. This will give you the look of nail holes that have been removed from the wood, which would have happened during years of use.
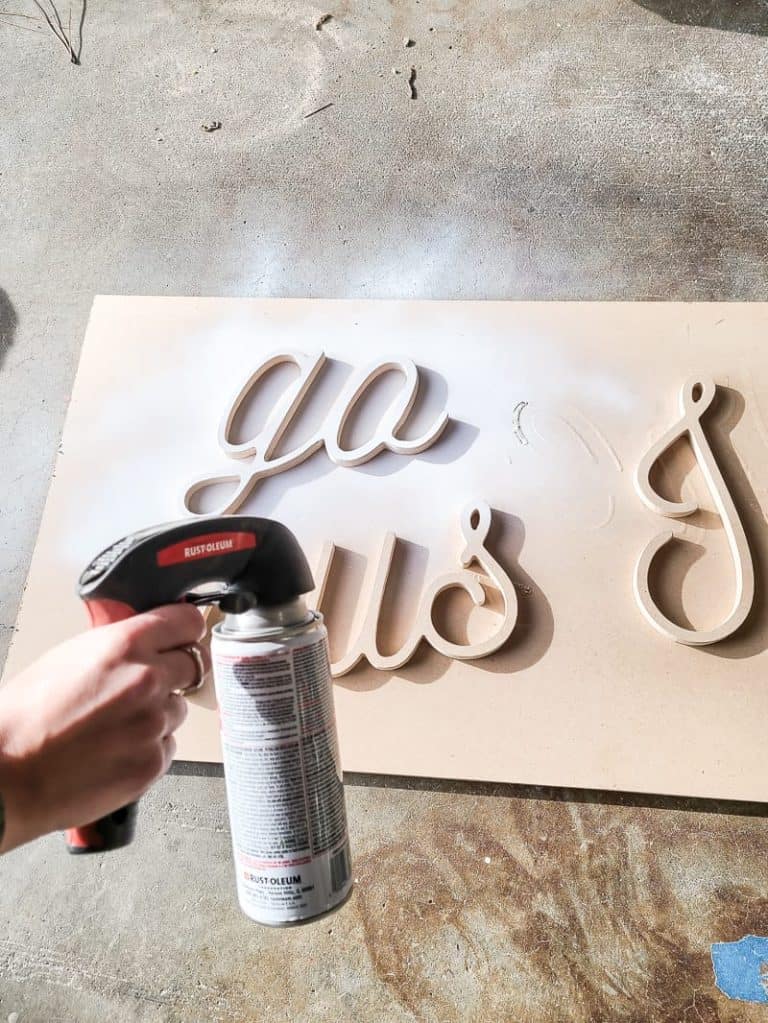
Step 7. Apply a propane blow torch over the wood
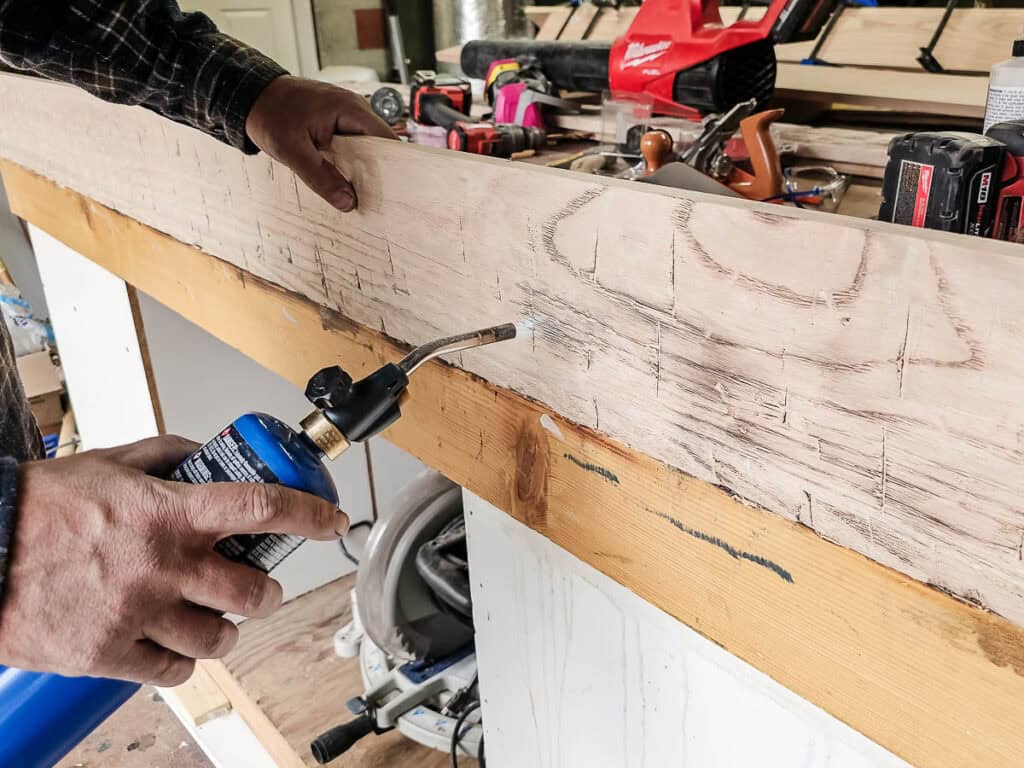
A blow torch was then used to expose the grains of the wood more. Shou sugi ban is a popular Japanese technique that involves burning the wood until it turns black.
We didn’t quite go that far with the burning, we just applied the heat on the wood surface until we saw the wood grain pop and become more defined. It’s all about going light and quick over the wood grains, not actually burning the wood.
Since we went with a lighter grey stain, the process of using the blow torch helped define the grains more by darkening them so you could see them more through the wood stain.
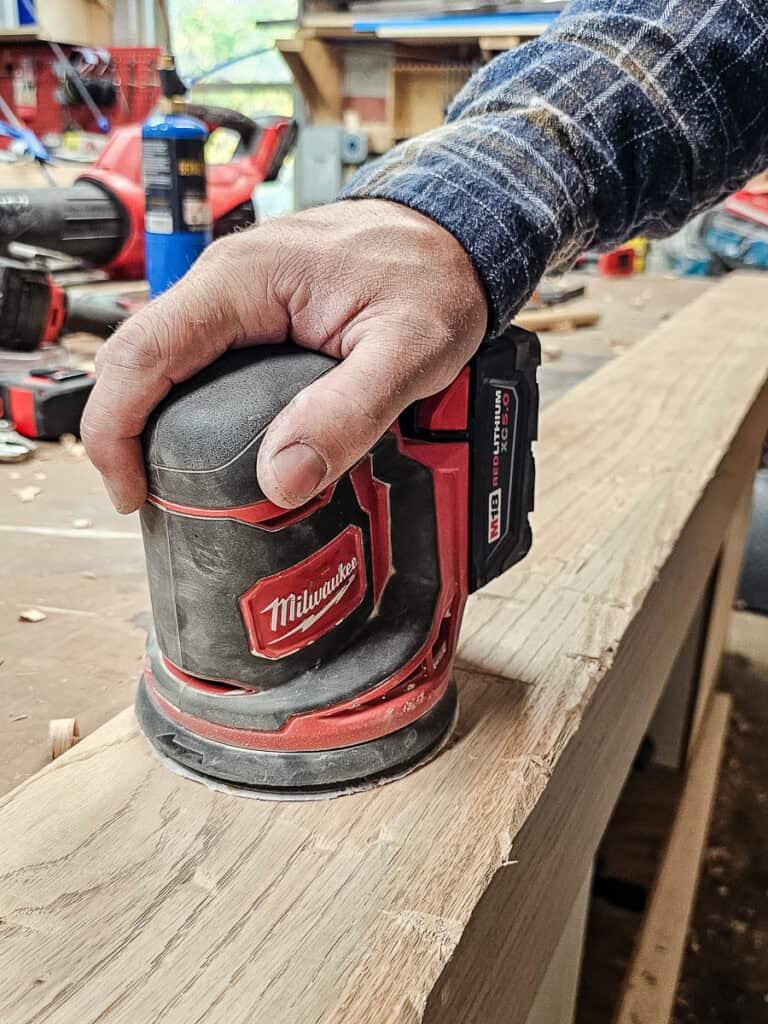
Step 8. Sand light with an orbital sander
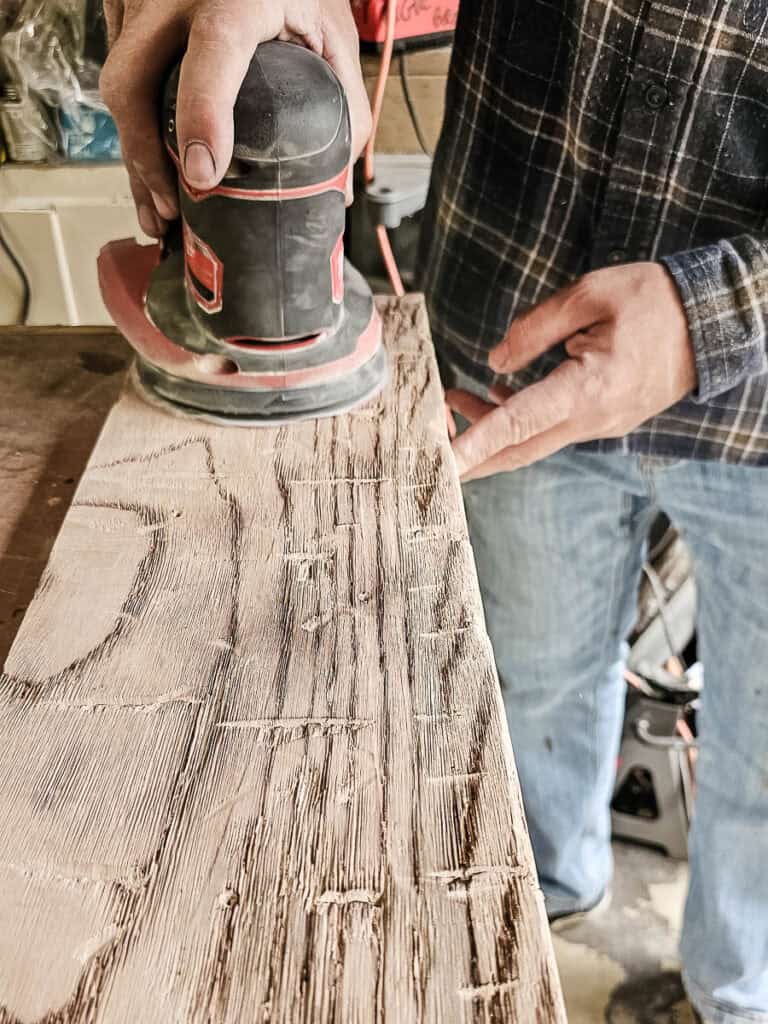
Distressing the wood using all these tools will leave splinters and all kinds of damage on the wood. Although that is part of the process, we wanted to have a smooth finish to the wood before we brought it inside to avoid giving anyone splinters, of course.
We used an orbital sander to get rid of most of these slivers and splinters. We were sure to use 220-grit sandpaper because you don’t want to sand too much of that rustic character off of the wood.
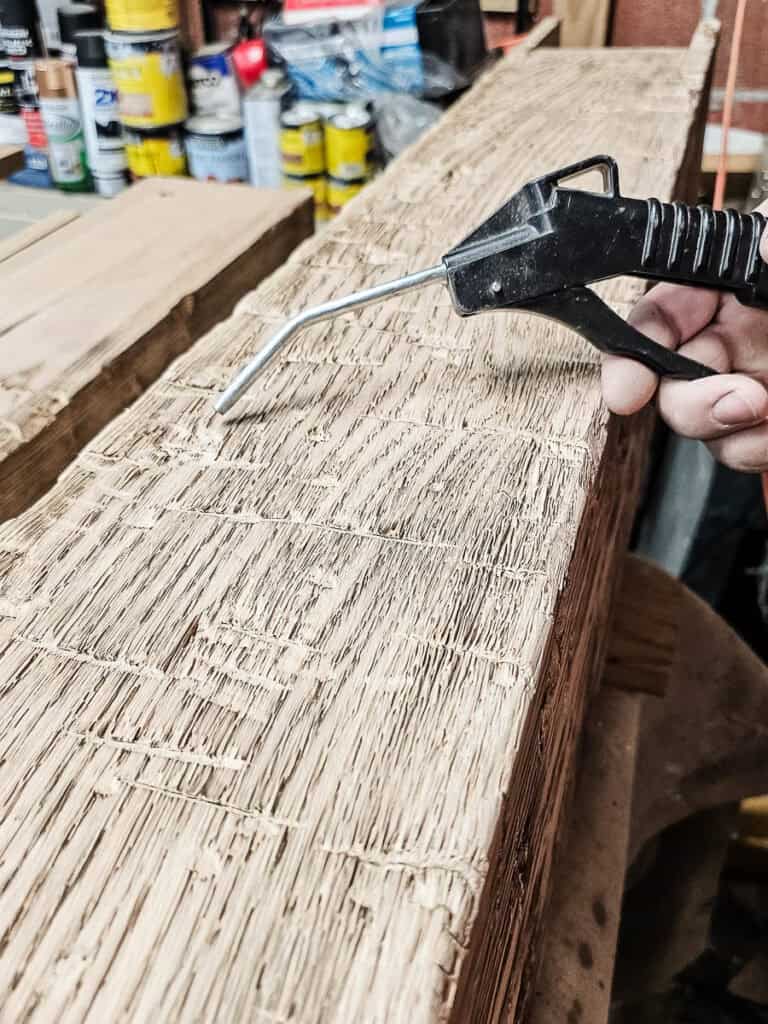
After sanding, blow out all of the sanding dust with compressed air to clean the wood before staining. This will get all the dust out of the nooks and crannies.
Step 9. Stain the wood
We used this wood stain color that had gray and brown undertones. The brown goes into the natural wood color and the gray pigments are pulled more into the damaged areas, which almost make it look like we layered stain colors – but we didn’t.
As an alternative idea here if you want to add even more to the aging of the wood, you could also apply a white vinegar solution combined with steel wool.
We’ve done this before on projects and it’s a great way to get a rustic look on wood in a matter of minutes by speeding up the oxidation of the wood. Here’s the general idea:
- Put small pieces of steel wool into a glass jar.
- Pour boiling vinegar and let it sit for about an hour.
- Remove and discard the steel wool.
- Brush on the remaining liquid from the vinegar/steel wool jar.
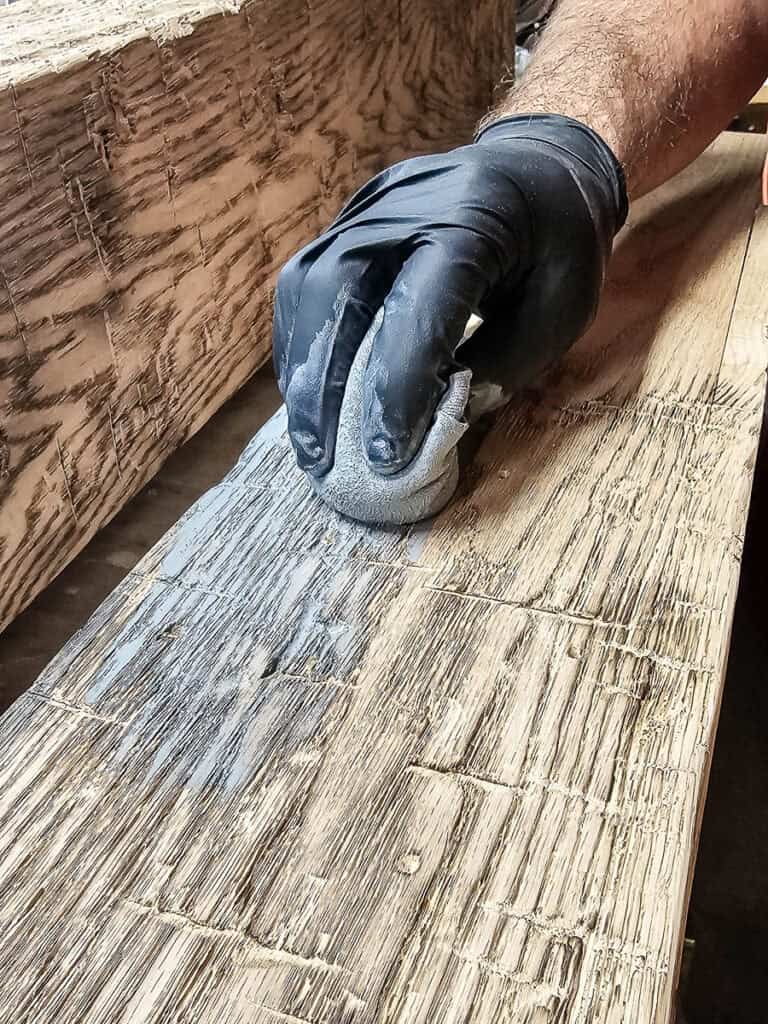
Step 10. Seal wood
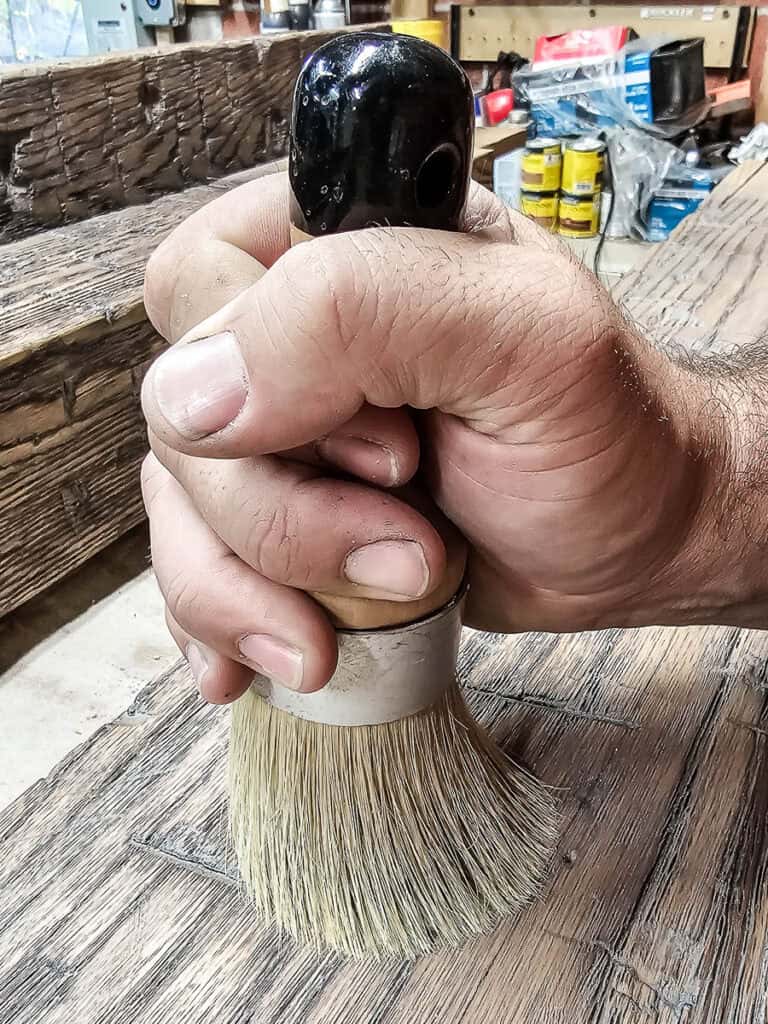
You don’t want to finish your project without sealing wood. This helps protect it from damage and will make it last longer. We didn’t want a shiny surface on the distressed wood, so we opted for a wax to give everything a smooth clear coat. Apply the wood wax with a round wax brush in a circular motion to get it into all the nooks and crannies of the distressed wood.
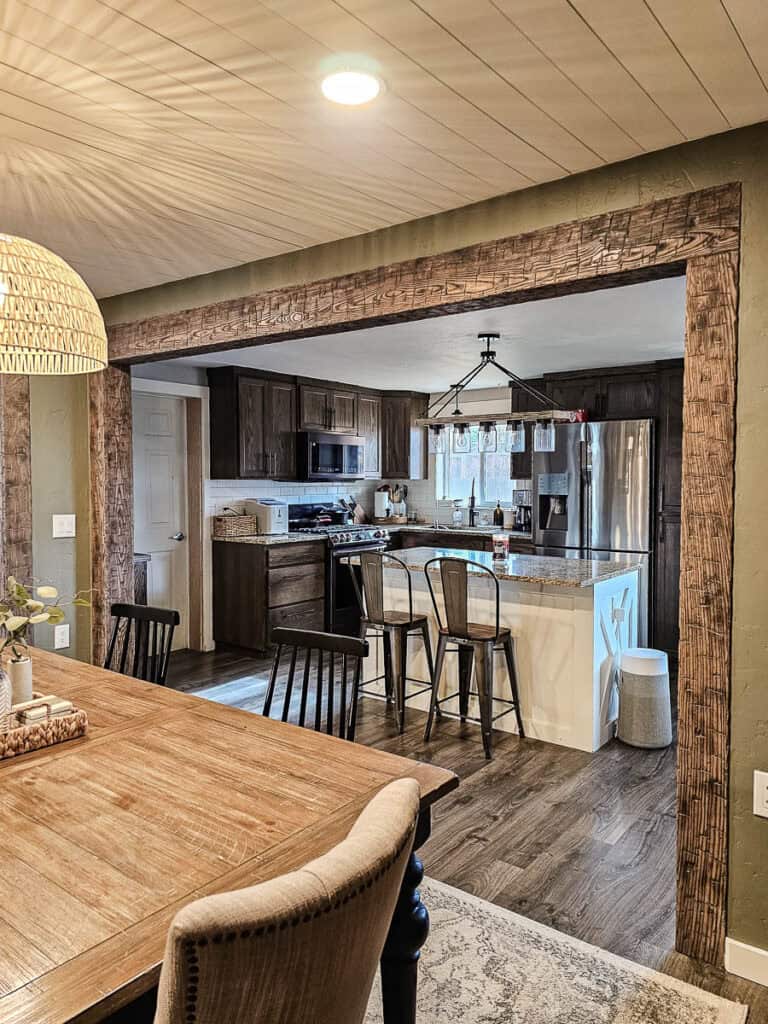
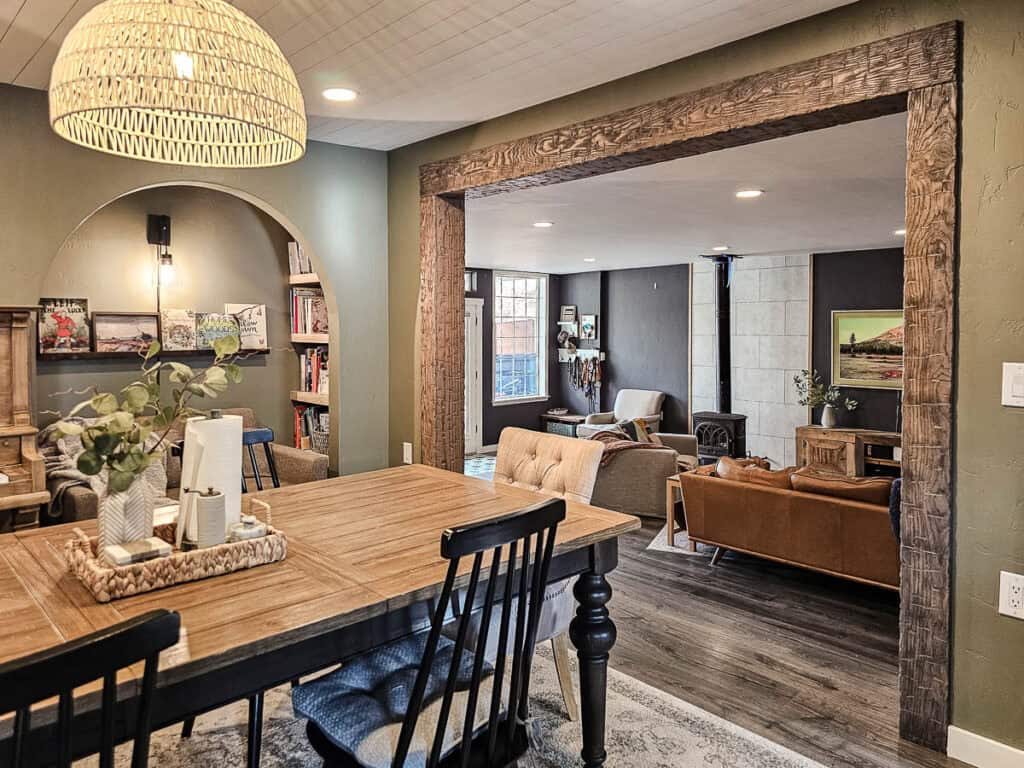
One of the goals with our faux wood beams was to make them look like they were really old and I think we accomplished that. By combining several different tools together, we created superficial damage to the wood that looks totally authentic!
The beams are one of the first things that you see when you walk in the front door of our home in our living room and they really make the dining room! Everyone who comes over to our house mentions how great they look.
It was a lot of work to manually distress the wood, but it was so worth it! You can totally make new wood look old if you take your time and layer together different distressing methods from different types of tools.
Do you have any questions about how to distress wood?
Let us know in the comments below!