Easy Garden Tool Storage In Backyard Shed
So, do you ever have those projects that you just never seem to finish?!
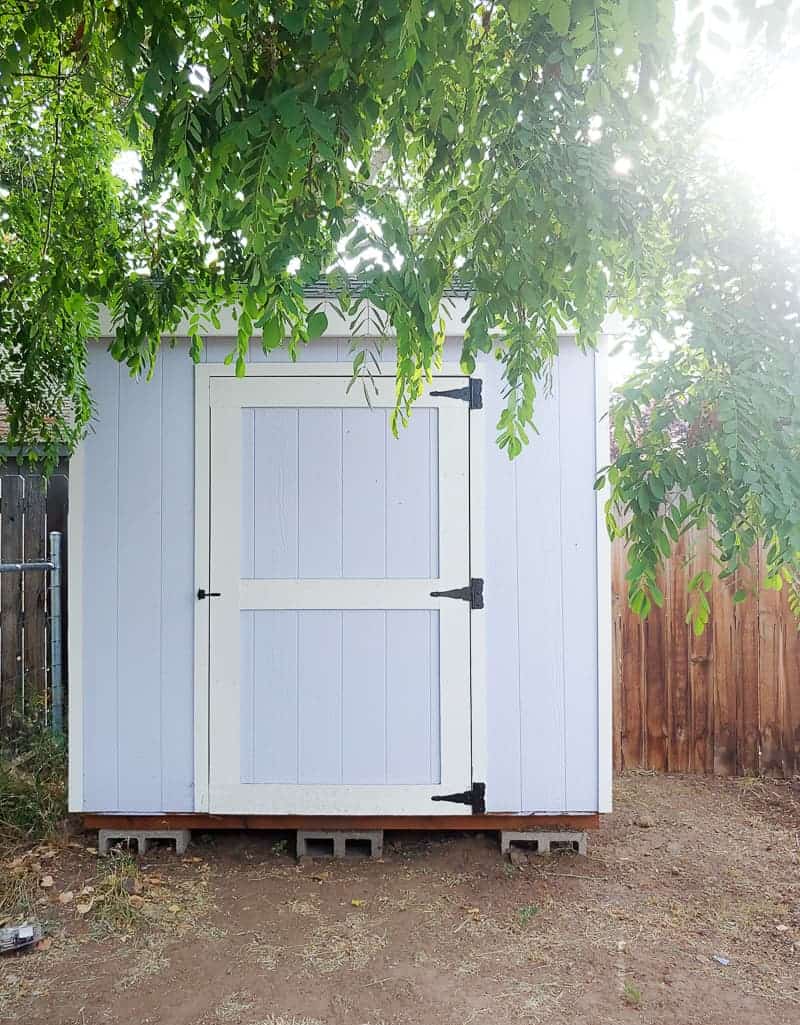
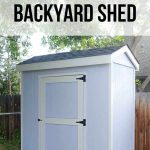
We built this DIY backyard shed last year. Logan built this backyard shed last year and silly ole me, I didn’t snag any pictures of him building it.
Do you want to see more of our big backyard makeover??
- Family Friendly Backyard Plan: Our Next Big Project (BEFORE Pictures)
- Large Chalkboard For Backyard With Live Roof
- Easy Garden Tool Storage In Backyard Shed
- DIY Build for Outdoor Vertical Garden Pots (With Free Plans)
- Mulch for Playground: Why We Chose Rubber Play Bark
- How to Plant Grass Seed
- How To Create A Cozy Patio
- How To Build A Paver Patio with Fire Pit
- How To Build A Fire Pit With Pavers
- Our Backyard Makeover Before and After Pictures
- How to Build a Wood Fence In Your Backyard
- How To Make a Wooden Gate for Your Fence
- How To Lay Deck Boards (and hide the screws!)
This garden tool storage post contains affiliate links, but nothing that I wouldn’t wholeheartedly recommend anyway! Read my full disclosure here.
Logan wrapped up right around the same time we started the bathroom renovation for One Room Challenge.
To be honest, it sat without a door on it for months while we focused on the bathroom reno.
And after that, it certainly looked finished. From the outside that is.
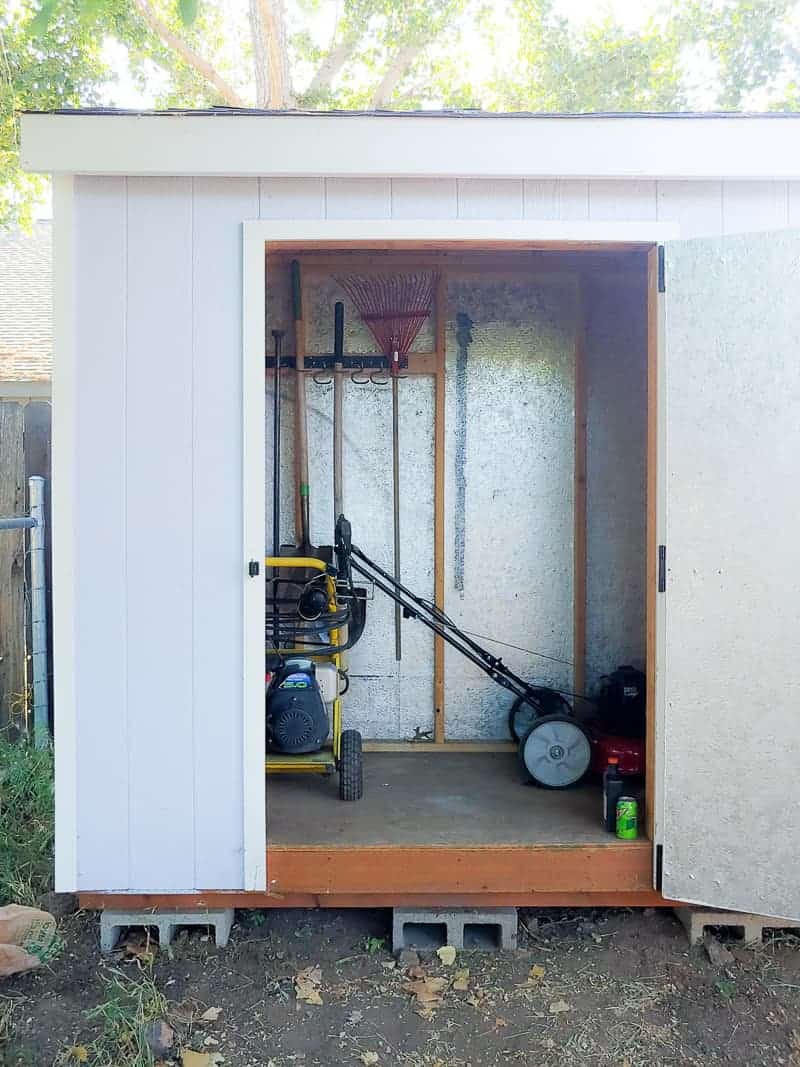
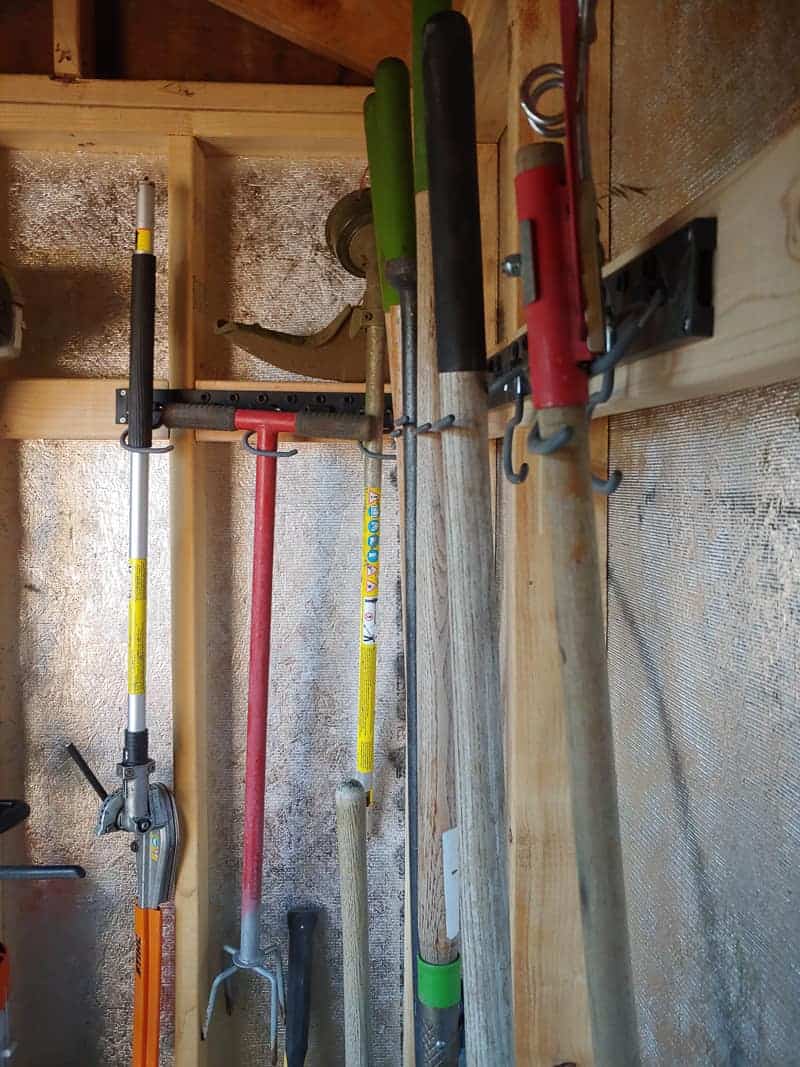
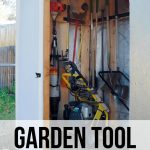
But when you opened the door of the backyard shed, it was pure chaos.
There were tons of shovels, rakes, and other garden tools thrown in the corner. The one you needed was always at the bottom.
And then you had to lift it up and over the pressure washer and the lawnmower. It was one of those “there’s got to be a better way” kinda situations.
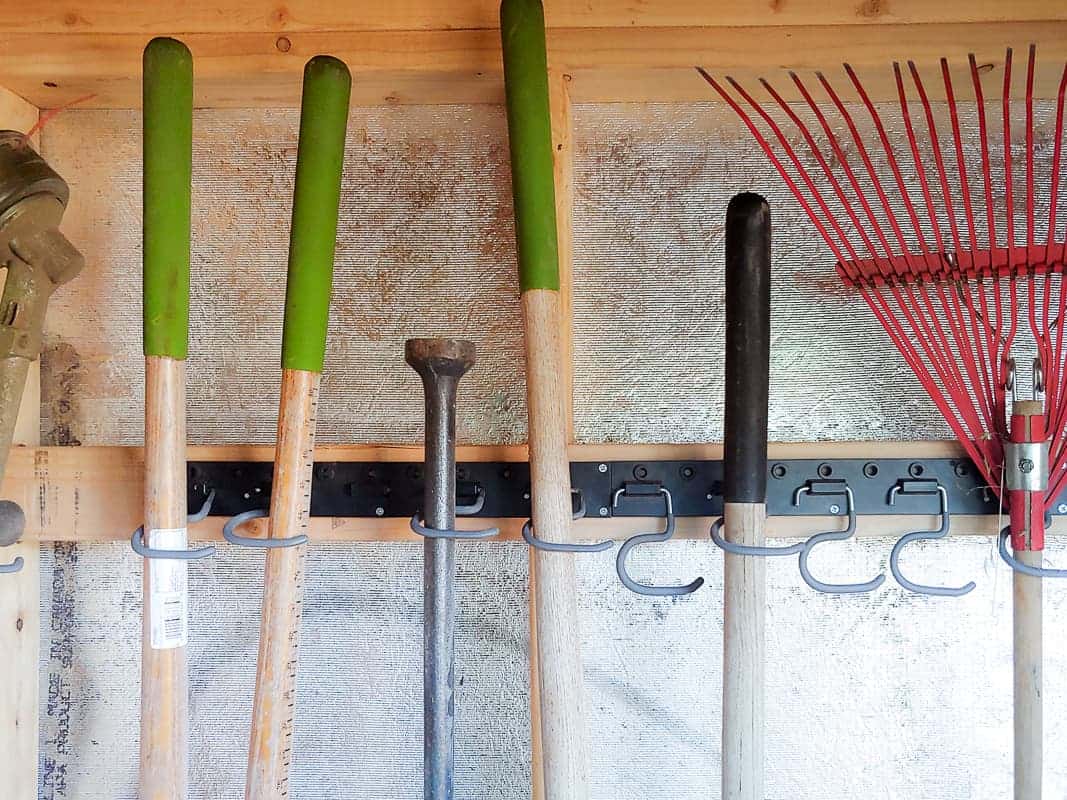
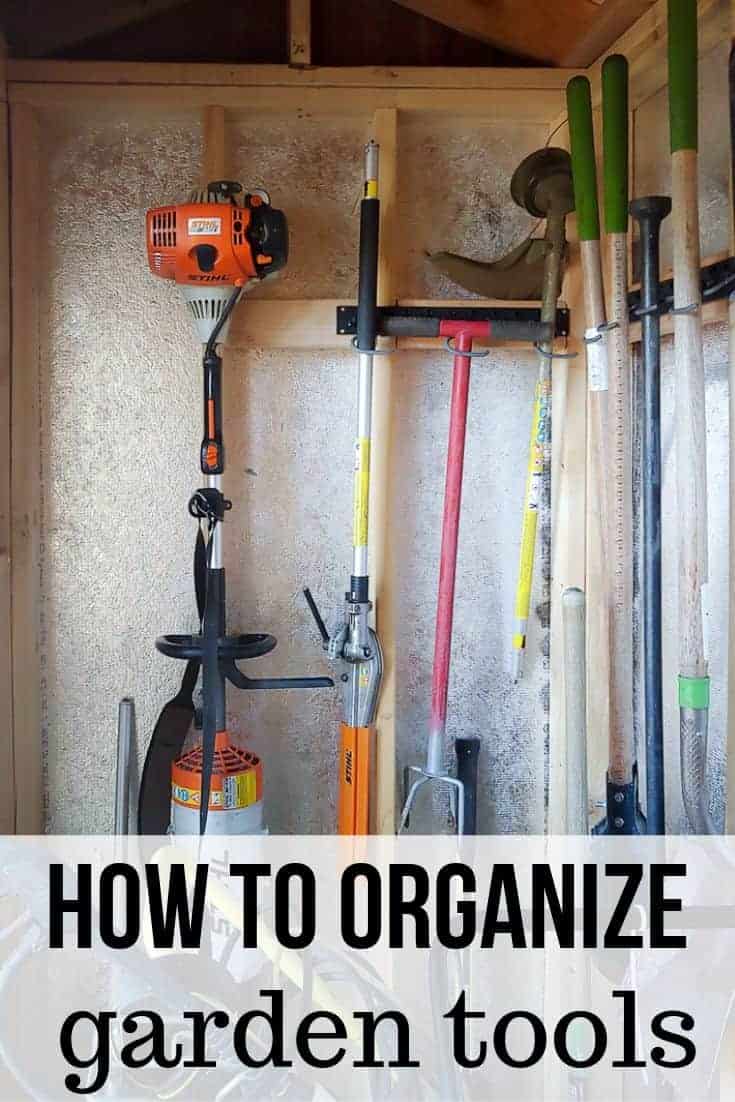
Easy Garden Tool Storage Solution – Wall Mounted
Little did I know, Logan had snagged a wall-mounted storage system that he just never got around to putting up after the shed was “finished”…..
Remember, I said this is one of those little side projects that you can just never seem to finish. Haha.
Well, all it took, friends, was one Saturday afternoon.
Logan grabbed some spare wood from the garage to put between the studs and this wall storage system and then VOILA….easy garden tool storage.
Everything was up and outta the way. I love that it cleared some floor space.

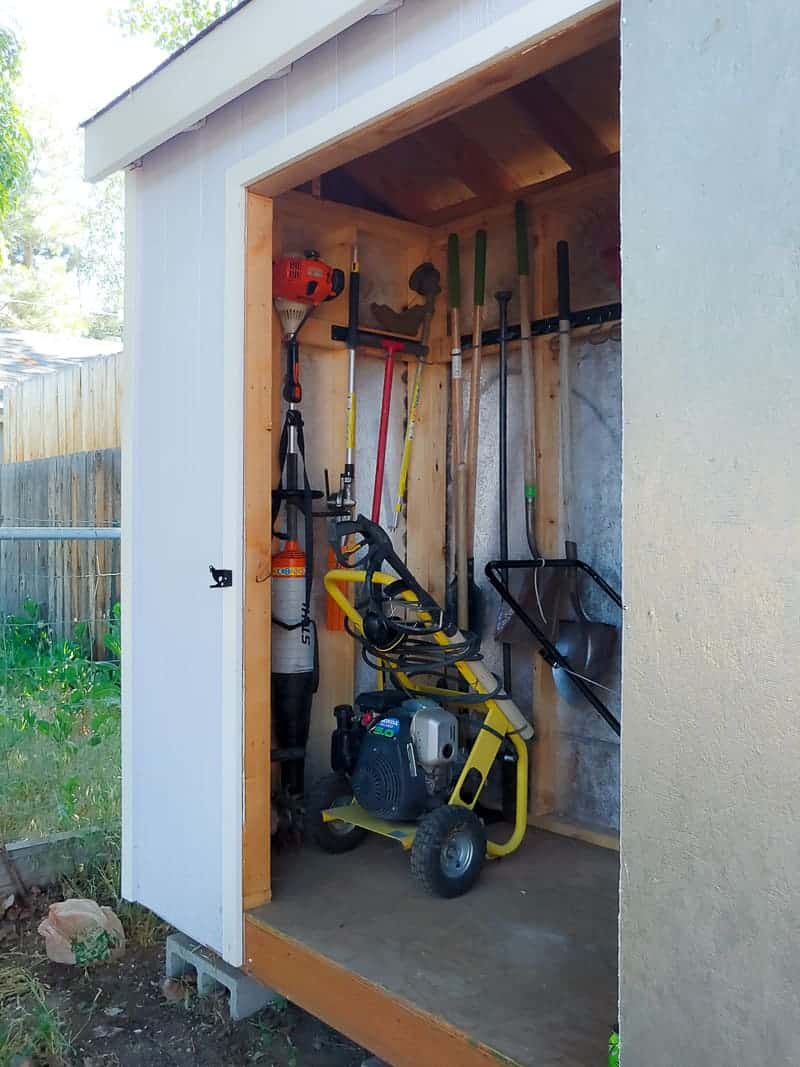
Our little backyard shed was finally organized (which always makes my heart a little happier). And…dare I say…even pretty. I mean…are garden tools supposed to look so pretty?!
Building A Budget Friendly Backyard Shed
If you’re wondering a little more about building that backyard shed, we definitely were able to do this on a budget.
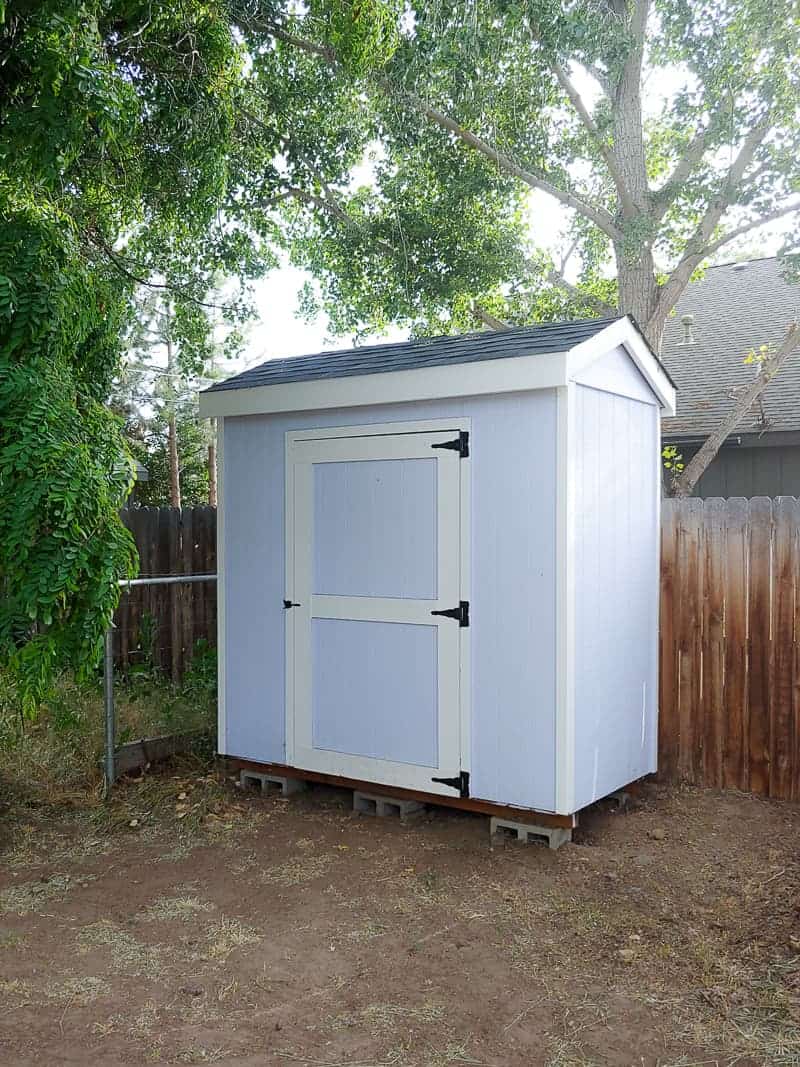
Here’s how we saved some money on this build:
- Found the T1-11 plywood siding for sale on Craigslist for $10 a sheet – would had normally been about $40+.
- Used primed siding – Luckily that siding we found was pre-primed (score), which helped save time and money on the paint.
- Found roofing shingles for sale on Craigslist for $11 a bundle – this would have cost us $27 normally. To be honest, it was the same guy Logan purchased some siding from. While he was picking the siding up, he saw the box of roofing shingles sitting nearby and asked him if he was getting rid of them too. Never hurts to ask.
- Found free plywood decking on Craigslist for the roof – One of the ways we save money on renovations is always always always keeping an eye on the Free section of Craigslist and Facebook Marketplace. You never know when someone is going to be throwing away something that you need. Logan came across and bunch of plywood decking that someone was getting rid of after they had installed a large solar field. He was able to use this one the roof under the shingles.
- Built shed on top of cinder blocks – A great way to prepare the foundation of your backyard shed that is budget friendly is to set it on cinder blocks. This makes it possible to move it later if needed!
Are you struggling with tripping over shovels and rakes in your garage or backyard shed? Grab a wall system to get your garden tools organized.
Don’t put it off forever as we did either! Trust me on this one. The Saturday afternoon project is well worth it! 🙂
How do you organize your garden tools?
Let us know in the comments below!

Fabulous. I am in love with this project.